Ford Ecosport: Body Closures / General Procedures - Liftgate Alignment
Ford Ecosport 2014-2026 Service and Repair Manual / Body and Paint / Body Closures / General Procedures - Liftgate Alignment
Inspection
-
Check liftgate-to-body dimensions.
Refer to: Body and Frame (501-26 Body Repairs - Vehicle Specific Information and Tolerance Checks, Description and Operation).
Adjustment
All alignments
-
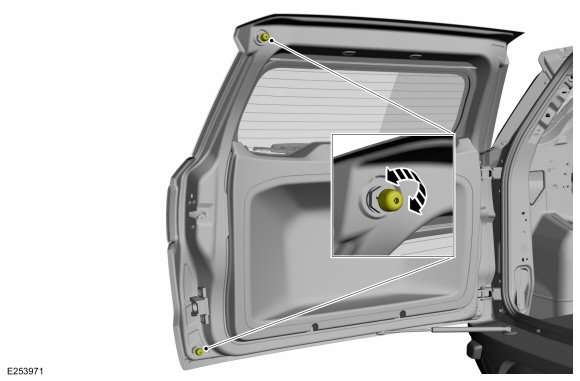
Open the liftgate.
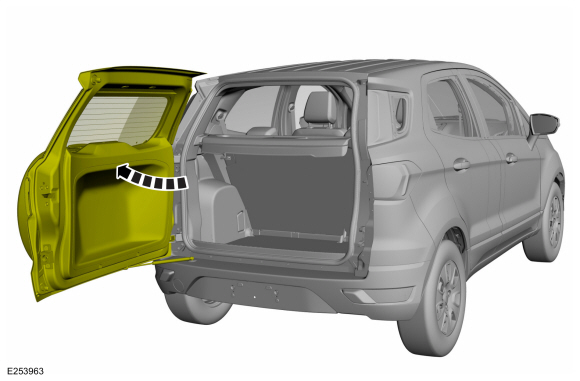 |
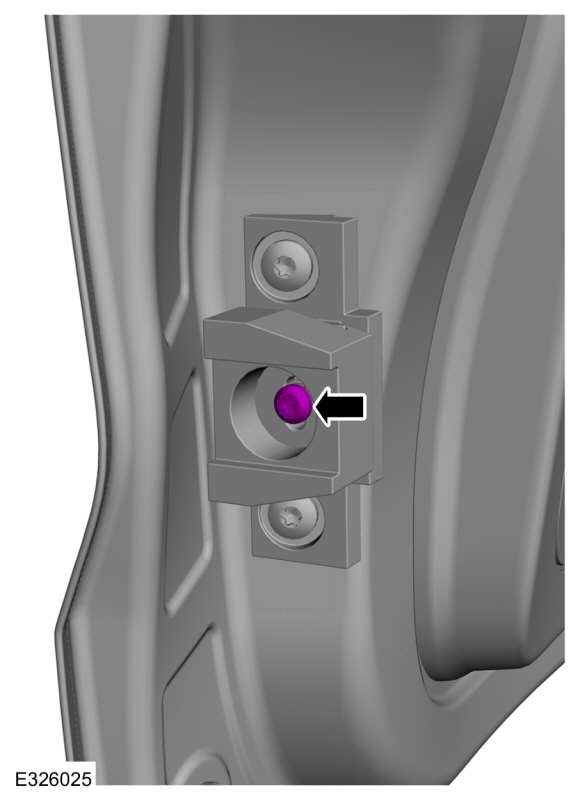
-
Remove the bolts and liftgate striker.
 |
Liftgate left and right, up and down alignment
-
Loosen the bolts enough to permit the movement of the liftgate.
 |
-
Carefully close the liftgate.
 |
-
Adjust the liftgate to specification.
Refer to: Body and Frame (501-26 Body Repairs - Vehicle Specific Information and Tolerance Checks, Description and Operation).
 |
-
Carefully open the liftgate.
|
-
Tighten the bolts.
Torque: 30 lb.ft (40 Nm)
|
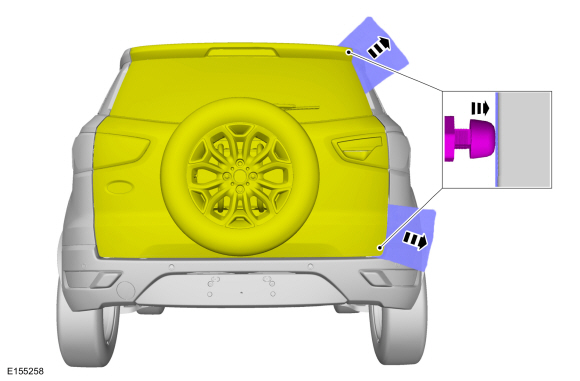
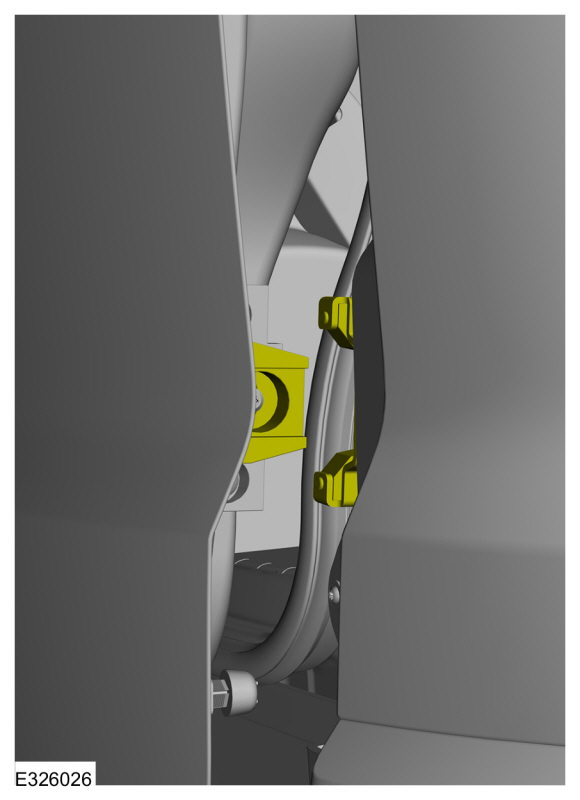
Liftgate in and out alignment
-
Remove the LH loadspace trim panel.
Refer to: Loadspace Trim Panel (501-05 Interior Trim and Ornamentation, Removal and Installation).
-
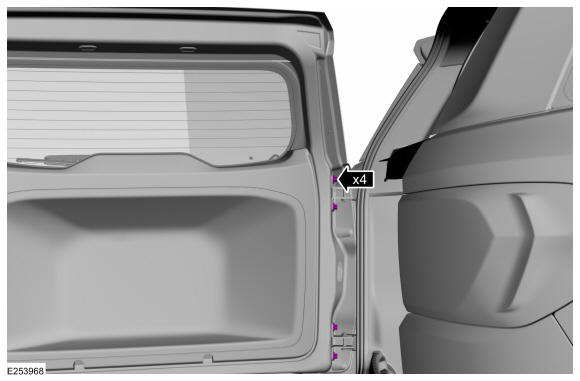
Loosen the nuts enough to permit the movement of the liftgate.
 |
-
NOTE: Multiple adjustments may be required to ensure flushness with the body side.
Adjust the nominal overslam bumpers.
 |
-
NOTE: Multiple adjustments may be required to ensure flushness with the body side.
Using plain A4 paper (or similar), place the paper over the swing gate bump stops in the door closure area and close the swing gate. Pull the paper outward to check if the paper can be removed from the closed swing gate. Repeat the adjustment procedure if the paper can be removed.
 |
-
Carefully open the liftgate.
|
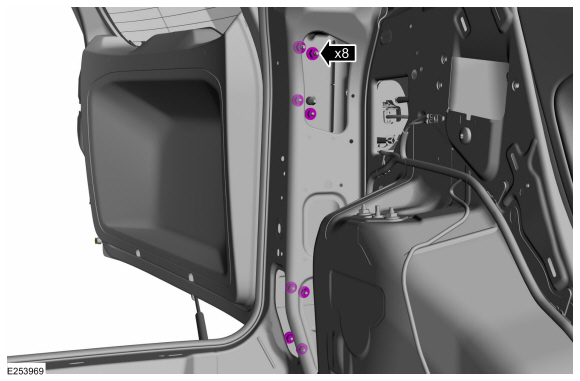
-
Tighten the nuts.
Torque:
1: 18 lb.ft (25 Nm)
2: 22 lb.ft (30 Nm)
 |
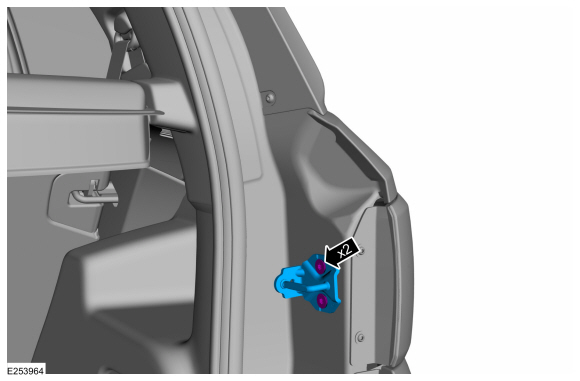
-
Thoroughly clean any dirt or debris from the bracket.
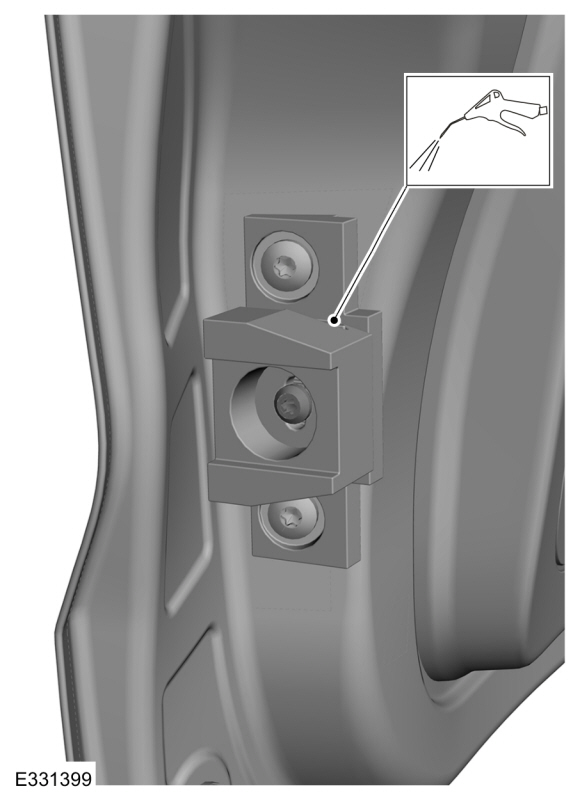 |
-
Loosen the swing gate mounted bumper bracket fastener.
Loosen: 2 turn(s)°
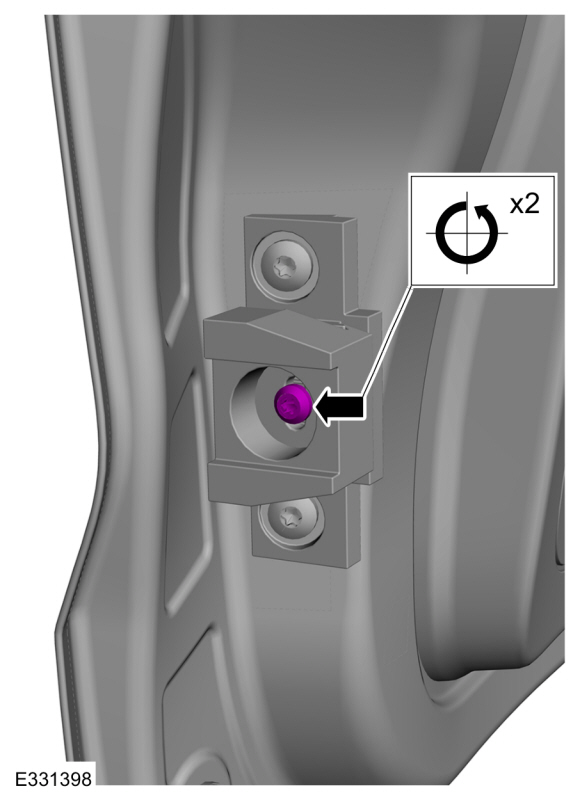 |
-
NOTE: Multiple adjustments may be required to ensure flushness with the body side.
Align the body side mounted bumper bracket with the swing gate mounted bumper bracket.
 |
-
Tighten the swing gate mounted bumper bracket fastener.
Torque: 97 lb.in (11 Nm)
 |
-
Install the LH loadspace trim panel.
Refer to: Loadspace Trim Panel (501-05 Interior Trim and Ornamentation, Removal and Installation).
All alignments
-
Install the liftgate striker and the bolts.
Torque: 177 lb.in (20 Nm)
|
-
Inspect the body-to-liftgate door dimensions.
Refer to: Body and Frame (501-26 Body Repairs - Vehicle Specific Information and Tolerance Checks, Description and Operation).
 |
 General Procedures - Rear Door Alignment
Inspection
NOTE:
LH side shown, RH side similar.
Check the body-to-rear door dimensions.
Refer to: Body and Frame (501-26 Body Repairs - Vehicle Specific Information and Tolerance Checks, Description and Operation)...
 Removal and Installation - Front Door
Special Tool(s) /
General Equipment
Door Lift
Removal
NOTE:
Removal steps in this procedure may contain installation details...
Other information:
Ford Ecosport 2014-2026 Service and Repair Manual: Description and Operation - Front Suspension - Overview
Overview The front suspension consists of the following components: Lower arms Stabilizer bar, bushings and links Wheel bearings Wheel hubs Wheel knuckles Wheel studs Suspensions strut and spring assemblies The front suspension uses a MacPherson strut system...
Ford Ecosport 2014-2026 Service and Repair Manual: Disassembly - Engine
Special Tool(s) / General Equipment 205-153 (T80T-4000-W) Handle 303-103 (T74P-6375-A) Holding Tool, FlywheelT74P-77000-ATKIT-2009TC-F 303-1247VCT Spark Plug Tube Seal Remover and InstallerTKIT-2006UF-FLMTKIT-2006UF-ROW 303-1565Alignment Tool, CamshaftTKIT-2010C-FLM 303-409 (T92C-6700-CH) Remover, Crankshaft SealTKIT-1992-FH/FMH/F..
Categories
- Manuals Home
- 2nd Gen Ford Ecosport Service Manual (2014 - 2026)
- Removal and Installation - Body Control Module (BCM)
- Diagnosis and Testing - Evaporative Emissions
- Body and Paint
- Specifications
- Description and Operation - Evaporative Emissions - System Operation and Component Description
Removal and Installation - Rear Halfshaft Seal
Special Tool(s) / General Equipment
 205-153
(T80T-4000-W)
205-153
(T80T-4000-W)
Handle
 205-990
Installer, Axle Seal
TKIT-2012A-FL
TKIT-2012A-ROW
Copyright © 2026 www.foecosport2.com