Ford Ecosport: Rear End Sheet Metal Repairs / Removal and Installation - Back Panel
Ford Ecosport 2014-2026 Service and Repair Manual / Body and Paint / Rear End Sheet Metal Repairs / Removal and Installation - Back Panel
Special Tool(s) / General Equipment
| Resistance Spotwelding Equipment | |
| 8 mm Drill Bit | |
| MIG/MAG Welding Equipment | |
| Spot Weld Drill Bit | |
| Locking Pliers |
Materials
| Name | Specification |
|---|---|
| Seam Sealer TA-2-B, 3M™ 08308, LORD Fusor® 803DTM |
- |
Removal
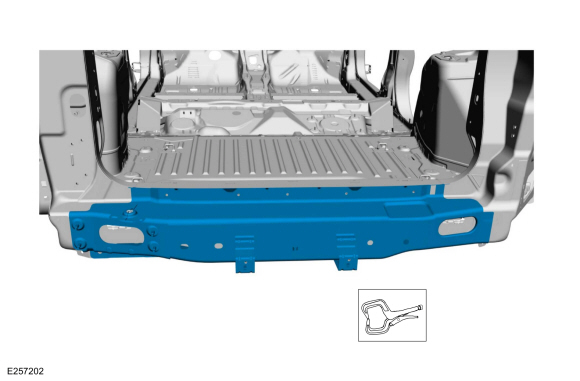
NOTE: The back panel is constructed of mild steel and High-Strength low alloy (HSLA) 350 grade steel and may be sectioned. The following assumes full component replacement. Adjust to meet repair needs.
-
Restore the vehicle to pre-accident dimensions, if required.
Refer to: Body and Frame (501-26 Body Repairs - Vehicle Specific Information and Tolerance Checks, Description and Operation).
-
Remove the following items:
-
Remove the rear bumper cover.
Refer to: Rear Bumper Cover (501-19 Bumpers, Removal and Installation).
-
Remove the liftgate.
Refer to: Liftgate (501-03 Body Closures, Removal and Installation).
-
Remove the rear bumper cover.
-
Reposition the carpeting and wiring harness away from the repair area.
-
Remove the fasteners and the reinforcement plate.
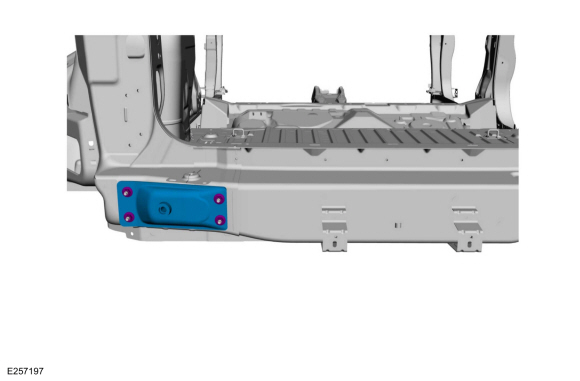 |
-
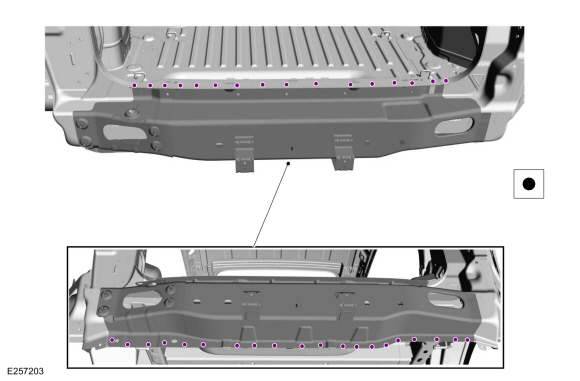
Remove the spot welds.
Use the General Equipment: Spot Weld Drill Bit
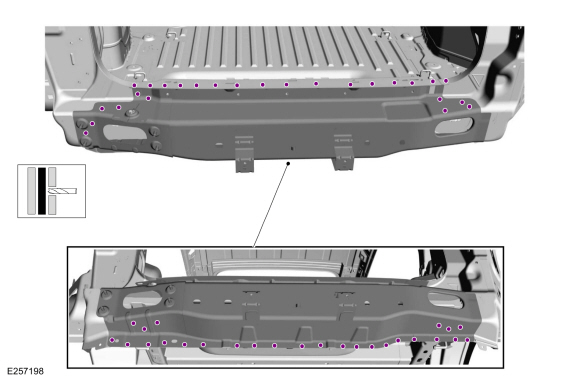 |
-
Use a wire wheel or equivalent tool to remove sealer and remove the back panel.
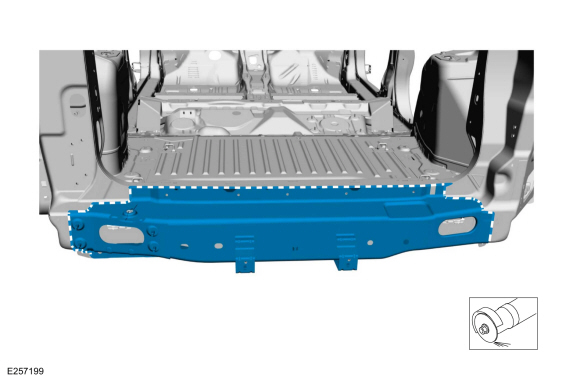 |
Installation
-
Refer to: Joining Techniques (501-25 Body Repairs - General Information, General Procedures).
-
Drill holes for plug welding in the replacement panel.
Use the General Equipment: 8 mm Drill Bit
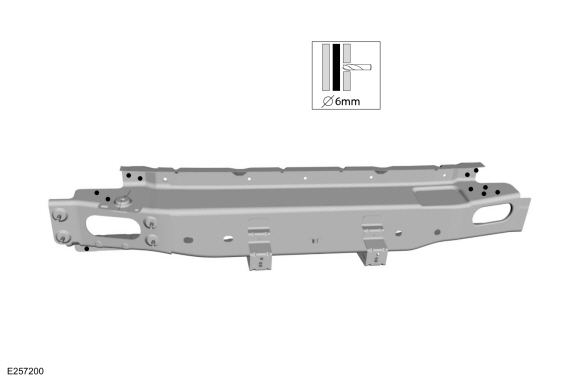 |
-
Install the panel and clamp in position.
Use the General Equipment: Locking Pliers
 |
-
Spot weld the flanges.
Use the General Equipment: Resistance Spotwelding Equipment
 |
-
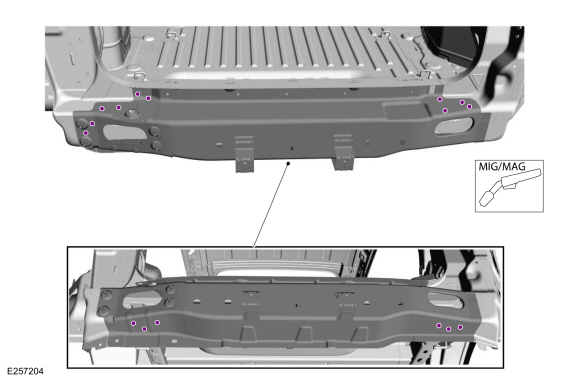
Plug weld the panel.
Use the General Equipment: MIG/MAG Welding Equipment
 |
-
Metal finish the welds using typical metal finishing techniques.
-
Sealing work: All areas must be sealed to production level.
Material: Seam Sealer / TA-2-B, 3M™ 08308, LORD Fusor® 803DTM
-
Refinish using a Ford approved paint system.
-
Restore corrosion protection.
Refer to: Corrosion Prevention (501-25 Body Repairs - General Information, General Procedures).
-
Install the reinforcement plate.
Torque: 177 lb.in (20 Nm)
|
-
Install the following items:
-
Install the rear bumper cover.
Refer to: Rear Bumper Cover (501-19 Bumpers, Removal and Installation).
-
Install the liftgate.
Refer to: Liftgate (501-03 Body Closures, Removal and Installation).
-
Install the loadspace trim panel.
Refer to: Loadspace Trim Panel (501-05 Interior Trim and Ornamentation, Removal and Installation).
-
Install the rear bumper cover.
-
Reposition the carpeting and wiring harness.


Other information:
Ford Ecosport 2014-2026 Service and Repair Manual: Removal and Installation - Front Door Trim Panel
Special Tool(s) / General Equipment Interior Trim Remover Removal NOTE: LH shown, RH similar. Remove the front interior door handle screw cover. Use the General Equipment: Interior Trim Remover Remove the front interior door handle screw. Release the..
Ford Ecosport 2014-2026 Service and Repair Manual: Removal and Installation - Ambient Air Temperature Sensor
Removal NOTE: Removal steps in this procedure may contain installation details. Remove the front bumper cover. Remove the ambient air temperature sensor. Disconnect the electrical connector. Detach and remove the ambient air temperature sensor. Installation To install..
Categories
- Manuals Home
- 2nd Gen Ford Ecosport Service Manual (2014 - 2026)
- Removal and Installation - Blower Motor
- Removal and Installation - Rear Bumper
- General Procedures - Battery Charging
- Removal and Installation - Front Seat
- Removal and Installation - Starter Motor
Removal and Installation - Wheel Knuckle Bushing
Special Tool(s) / General Equipment
Hydraulic PressRemoval
NOTE: Removal steps in this procedure may contain installation details.
Remove the wheel knuckle.Refer to: Wheel Knuckle - Vehicles With: Rear Drum Brakes (204-02B Rear Suspension - AWD, Removal and Installation).
Remove the rear toe adjustment retainers and remove the wheel knuckle mounting bracket.
Torque:
Stage 1: 177 lb.in (20 Nm)
Stage 2: 76 lb.ft (103 Nm)
Copyright © 2026 www.foecosport2.com