Ford Ecosport: Rear Suspension - AWD / Removal and Installation - Wheel Knuckle Bushing
Ford Ecosport 2014-2026 Service and Repair Manual / Suspension / Rear Suspension - AWD / Removal and Installation - Wheel Knuckle Bushing
Special Tool(s) / General Equipment
| Hydraulic Press |
Removal
NOTE: Removal steps in this procedure may contain installation details.
-
Remove the wheel knuckle.
Refer to: Wheel Knuckle - Vehicles With: Rear Drum Brakes (204-02B Rear Suspension - AWD, Removal and Installation).
-
Remove the rear toe adjustment retainers and remove the wheel knuckle mounting bracket.
Torque:
Stage 1: 177 lb.in (20 Nm)
Stage 2: 76 lb.ft (103 Nm)
 |
-
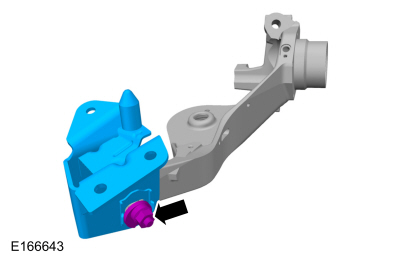
Remove the rubber stopper.
 |
-
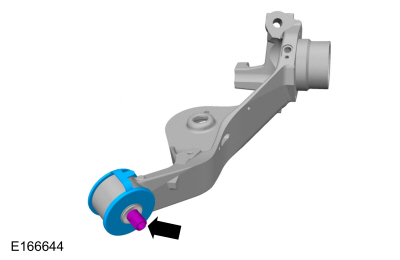
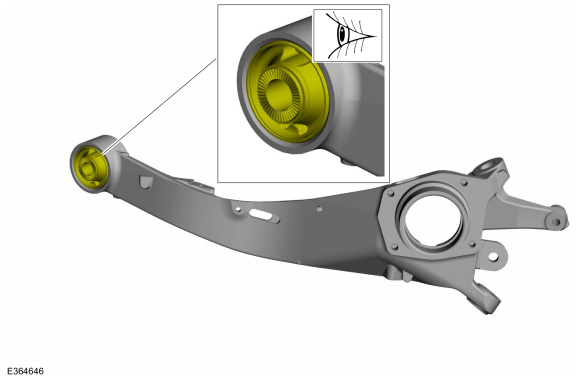
NOTE: Note the position of the component before removal.
Using a suitable tool, remove the wheel knuckle bushing.
Use the General Equipment: Hydraulic Press
 |
Installation
-
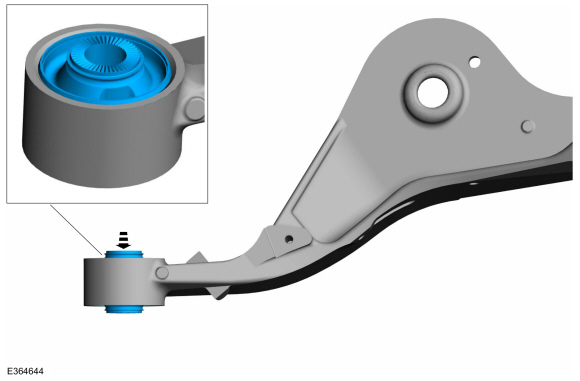
NOTE: Make sure that the component is installed to the position noted before removal.
Using a suitable tool, install the new wheel knuckle bushing.
Use the General Equipment: Hydraulic Press
 |
-
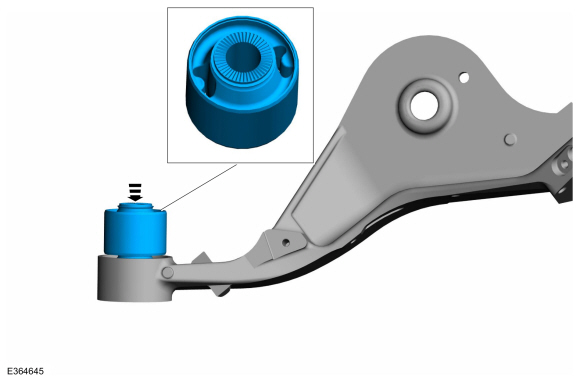
NOTE: Make sure that the component is correctly installed.
Visual check.
Make sure that wheel knuckle bushing is properly fitted into the wheel knuckle.
 |
-
To install, reverse the removal procedure.
-
Check and if necessary adjust rear toe.
Refer to: Rear Toe Adjustment - AWD (204-00 Suspension System - General Information, General Procedures).
 Removal and Installation - Rear Shock Absorber
Special Tool(s) /
General Equipment
Transmission Jack
Removal
NOTICE:
Suspension fasteners are critical parts that affect the
performance of vital components and systems...
 Removal and Installation - Wheel Bearing and Wheel Hub - Vehicles With: Rear Disc Brakes
Special Tool(s) /
General Equipment
204-180
(T93P-5493-A)
Remover/Installer, BushingTKIT-1993-FLMTKIT-1993-LMTKIT-1993-FM
205-014
(T60K-4616-A)
Installer, Drive Pinion Bearing Cup
205-090
(T75L-1165-B)
Plate, Bearing/Oil Seal
205-140
(T80T-4000-F)
Installer, Drive Pinion Bearing Cup
205-153
(T80T-4000-W)
Handle
..
Other information:
Ford Ecosport 2014-2026 Service and Repair Manual: Removal and Installation - Driver Side Register
Special Tool(s) / General Equipment Interior Trim Remover Removal NOTE: Removal steps in this procedure may contain installation details. Release the clips and remove the driver side register. Use the General Equipment: Interior Trim Remover Installation To install, reverse the removal procedure. ..
Ford Ecosport 2014-2026 Service and Repair Manual: Removal and Installation - Audio Unit Amplifier
Removal Position the rear seat cushion to the full forward position. Position the carpet flap forward. Remove the audio unit amplifier cover. Separate the wire guide, disconnect the connectors , remove the nuts and the audio unit ampli..
Categories
- Manuals Home
- 2nd Gen Ford Ecosport Service Manual (2014 - 2026)
- Body and Paint
- Description and Operation - Jacking and Lifting - Overview
- Automatic Transmission - 6-Speed Automatic Transmission – 6F35
- Removal and Installation - Front Seat
- Removal and Installation - Body Control Module (BCM)
Removal and Installation - Steering Column Shaft
Removal
NOTE: Removal steps in this procedure may contain installation details.
NOTICE: Do not allow the steering column to rotate while the steering column shaft is disconnected or damage to the steering column internal sensor may result.
NOTE: Use a steering wheel holding device (such as Hunter® 28-75-1 or equivalent)
Hold the steering wheel in the straight-ahead position.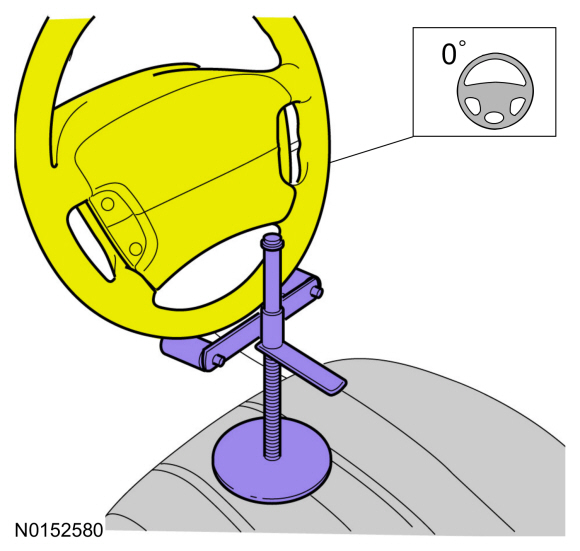
Copyright © 2026 www.foecosport2.com