Ford Ecosport: Body Closures / Removal and Installation - Rear Door Check Arm
Ford Ecosport 2014-2026 Service and Repair Manual / Body and Paint / Body Closures / Removal and Installation - Rear Door Check Arm
Removal
NOTE: Removal steps in this procedure may contain installation details.
NOTE: LH side shown, RH side similar.
-
Open the rear door.
 |
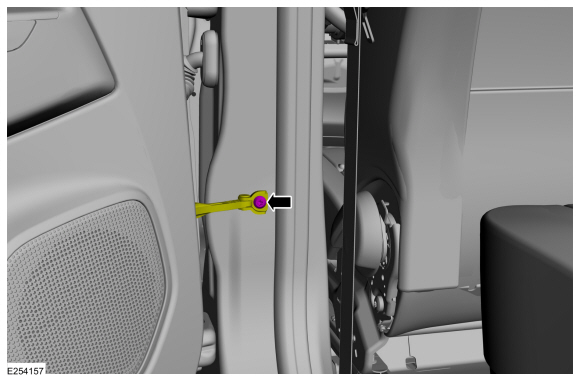
-
Remove the check arm bolt.
Torque: 17 lb.ft (23 Nm)
 |
-
Remove the rear door trim panel.
Refer to: Rear Door Trim Panel (501-05 Interior Trim and Ornamentation, Removal and Installation).
-
NOTE: Door removed from vehicle for clarity.
Remove the rear door speaker.
-
Disconnect the electrical connector.
-
Remove the bolts and the speaker.
Torque: 12 lb.in (1.3 Nm)
-
Disconnect the electrical connector.
 |
-
NOTE: Door removed from vehicle for clarity.
Remove the rear door check arm cover.
 |
-
NOTE: Door removed from vehicle for clarity.
Remove the rear door check arm nuts.
Torque: 71 lb.in (8 Nm)
 |
-
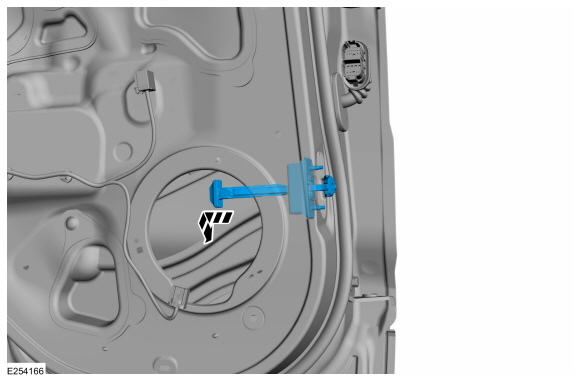
NOTE: Door removed from vehicle for clarity.
Remove the rear door check arm assembly.
 |
Installation
-
To install, reverse the removal procedure.
 Removal and Installation - Rear Door
Special Tool(s) /
General Equipment
Door Lift
Removal
NOTE:
Removal steps in this procedure may contain installation details...
 Removal and Installation - Rear Door Hinge
Removal
NOTE:
Removal steps in this procedure may contain installation details.
Remove the rear door.
Refer to: Rear Door (501-03 Body Closures, Removal and Installation)...
Other information:
Ford Ecosport 2014-2026 Service and Repair Manual: General Procedures - Plastic Repairs
Special Tool(s) / General Equipment ALCV-200 Materials Name Specification Plastic Bonding AdhesiveTA-9 - Inspection NOTE: Plastics Identification WARNING: Before beginning any service procedure in this section, REFER to Safety Warnings in section 100-00 General Information...
Ford Ecosport 2014-2026 Service and Repair Manual: Removal and Installation - Instrument Panel
Special Tool(s) / General Equipment Locking Pliers Removal NOTE: Removal steps in this procedure may contain installation details. NOTE: During the removal or installation of components, cap, tape or otherwise appropriately protect all openings and tubes/fittings to prevent the ingress of dirt or other contamination...
Categories
- Manuals Home
- 2nd Gen Ford Ecosport Service Manual (2014 - 2026)
- Removal and Installation - Rear Bumper
- General Procedures - Transmission Fluid Level Check
- Removal and Installation - Evaporative Emission Canister Purge Valve
- Specifications
- Diagnosis and Testing - Evaporative Emissions
Removal and Installation - Rear Halfshaft Seal
Special Tool(s) / General Equipment
 205-153
(T80T-4000-W)
205-153
(T80T-4000-W)
Handle
 205-990
Installer, Axle Seal
TKIT-2012A-FL
TKIT-2012A-ROW
Copyright © 2026 www.foecosport2.com