Ford Ecosport: Parking Brake and Actuation / Removal and Installation - Parking Brake Control
Ford Ecosport 2014-2026 Service and Repair Manual / Brake System / Parking Brake and Actuation / Removal and Installation - Parking Brake Control
Removal
NOTE: Removal steps in this procedure may contain installation details.
NOTE: LHD shown, RHD similar.
All vehicles
-
Remove the floor console.
Refer to: Floor Console (501-12 Instrument Panel and Console, Removal and Installation).
-
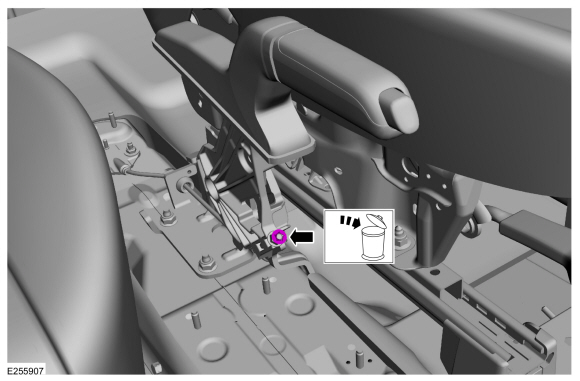
Remove and discard the lock nut.
 |
-
Remove and discard the parking brake cable adjustment nut.
 |
-
With the vehicle in NEUTRAL, position it on a hoist.
Refer to: Jacking and Lifting - Overview (100-02 Jacking and Lifting, Description and Operation).
1.0L / 1.5L
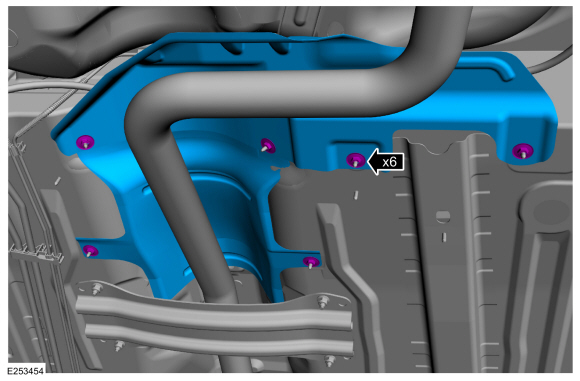
-
Remove the nuts and the heat shields.
Torque: 27 lb.in (3 Nm)
 |
2.0L
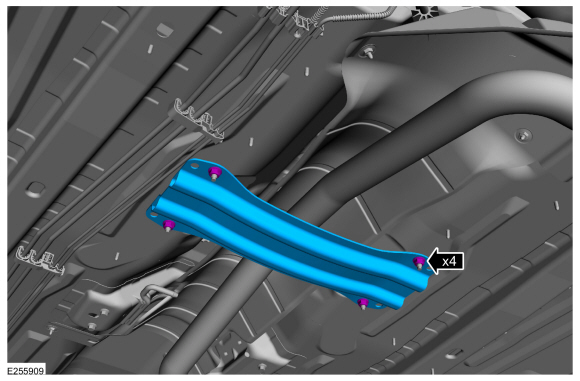
-
Remove the nuts and the crossbars.
Torque: 18 lb.ft (25 Nm)
 |
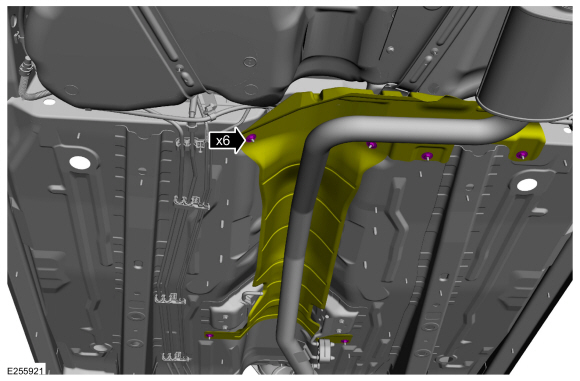
-
Remove the nuts and position the heat shield to allow access to the parking brake cable equalizer.
Torque: 27 lb.in (3 Nm)
 |
All vehicles
-
Remove the parking brake cable equalizer plug.
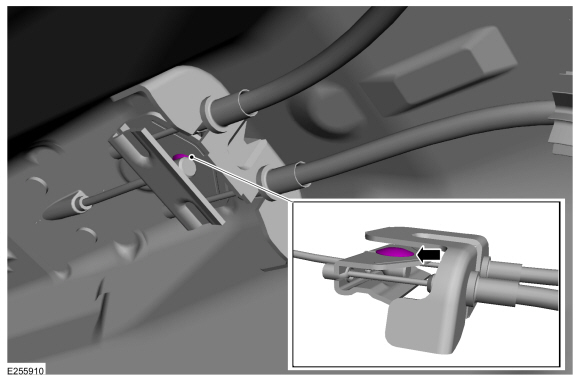 |
-
Press inward on the tabs and detach the parking brake cables from the bracket.
 |
-
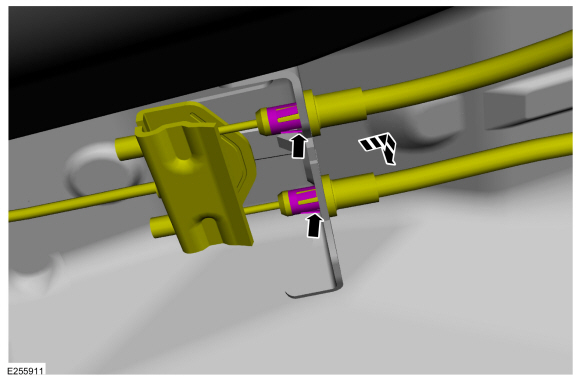
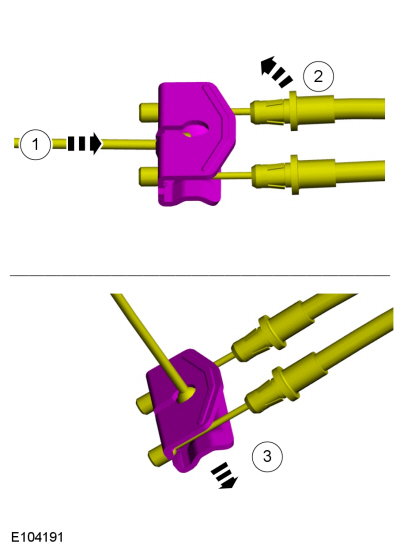
-
Align the end of the front cable with the hole in the equalizer.
-
Rotate both rear cables upward.
-
Disconnect the front cable from the equalizer.
-
Align the end of the front cable with the hole in the equalizer.
 |
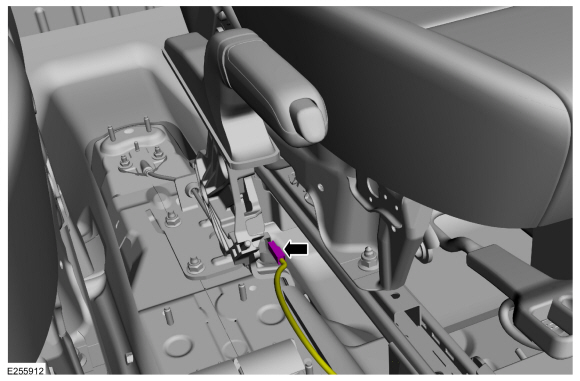
-
Disconnect the parking brake switch electrical connector.
 |
-
-
Remove the bolt.
Torque: 18 lb.ft (25 Nm)
- Remove the nuts. Torque: 18 lb.ft (25 Nm)
-
Remove the nuts and the parking brake control and front cable assembly.
Torque: 97 lb.in (11 Nm)
-
Remove the bolt.
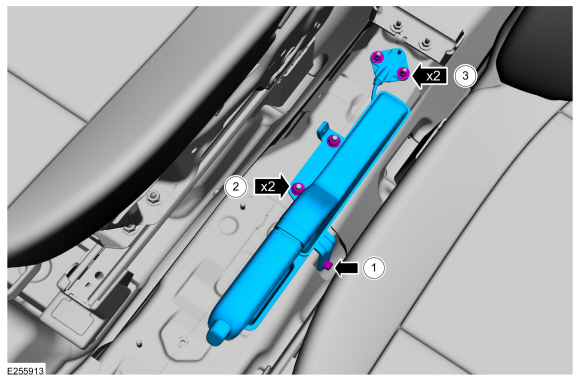 |
Installation
-
To install, reverse the removal procedure.
-
Adjust the parking brake cables.
Refer to: Parking Brake Cable Adjustment - Vehicles With: Rear Drum Brakes (206-05 Parking Brake and Actuation, General Procedures).
Refer to: Parking Brake Cable Adjustment - Vehicles With: Rear Disc Brakes (206-05 Parking Brake and Actuation, General Procedures).
 Removal and Installation - Parking Brake Cable - Vehicles With: Rear Disc Brakes
Removal
NOTE:
Removal steps in this procedure may contain installation details.
All vehicles
Detach the parking brake control boot and position the boot upward on the handle...
 Removal and Installation - Parking Brake Front Cable
Removal
NOTE:
Removal steps in this procedure may contain installation details.
NOTE:
Left hand drive (LHD) shown, right hand drive (RHD) similar...
Other information:
Ford Ecosport 2014-2026 Service and Repair Manual: Description and Operation - Module Controlled Functions - Component Location
Item Description 1 BCM 2 PDM (if equipped) 3 DDM (if equipped) 4 RDM - LH (if equipped) 5 RDM - RH (if equipped) ..
Ford Ecosport 2014-2026 Service and Repair Manual: Diagnosis and Testing - Direct Clutch Assembly
Direct Clutch For direct (3,5,R) clutch operation, REFER to: Transmission Description (307-01B Automatic Transmission - 6-Speed Automatic Transmission – 6F35, Description and Operation). REFER to: Direct Clutch Assembly (307-01B Automatic Transmission - 6-Speed Automatic Transmission – 6F35, Description and Operation). Direct Clutch ..
Categories
- Manuals Home
- 2nd Gen Ford Ecosport Service Manual (2014 - 2026)
- Diagnosis and Testing - Evaporative Emissions
- Service Information
- General Procedures - Battery Charging
- Description and Operation - Evaporative Emissions - System Operation and Component Description
- Removal and Installation - Rear Bumper
Removal and Installation - Wheel Knuckle Bushing
Special Tool(s) / General Equipment
Hydraulic PressRemoval
NOTE: Removal steps in this procedure may contain installation details.
Remove the wheel knuckle.Refer to: Wheel Knuckle - Vehicles With: Rear Drum Brakes (204-02B Rear Suspension - AWD, Removal and Installation).
Remove the rear toe adjustment retainers and remove the wheel knuckle mounting bracket.
Torque:
Stage 1: 177 lb.in (20 Nm)
Stage 2: 76 lb.ft (103 Nm)
Copyright © 2026 www.foecosport2.com