Ford Ecosport: Interior Trim and Ornamentation / Removal and Installation - Headliner - Lowering
-
Remove the following items:
-
On both sides.
Remove the A-pillar trim panel.
Refer to: A-Pillar Trim Panel (501-05 Interior Trim and Ornamentation, Removal and Installation).
-
On both sides.
Remove the B-pillar trim panel.
Refer to: B-Pillar Trim Panel (501-05 Interior Trim and Ornamentation, Removal and Installation).
-
On both sides.
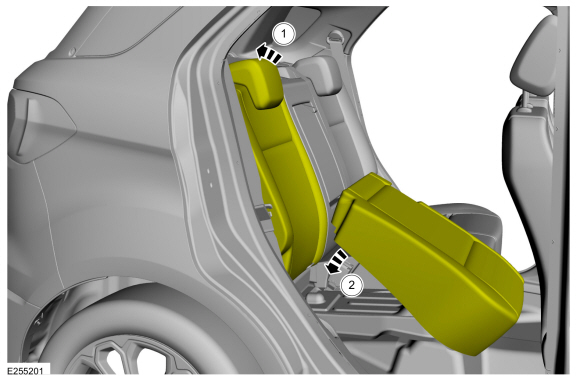
Remove the D-pillar trim panel.
Refer to: D-Pillar Trim Panel (501-05 Interior Trim and Ornamentation, Removal and Installation).
-
Remove the overhead console.
Refer to: Overhead Console (501-12 Instrument Panel and Console, Removal and Installation).
-
On both sides.
Position the rear seat in the upright position.
-
Position the rear seat backrest in the full upright position.
-
Position the rear seat cushion in the normal position.
-
On both sides.
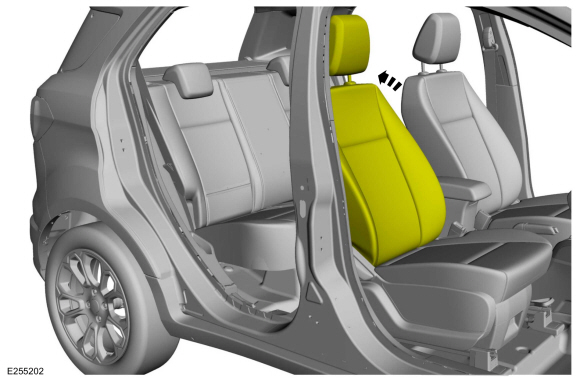
Fully recline the front seat backrest.
-
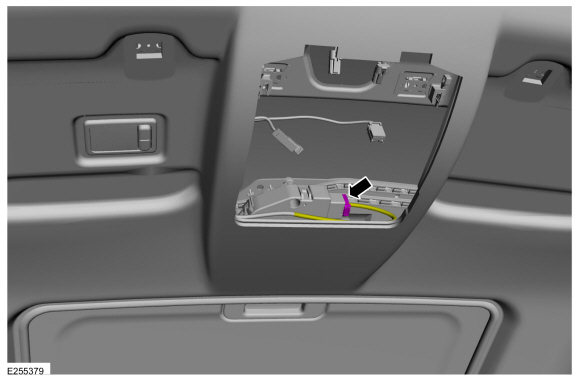
On RH side.
Disconnect the electrical connectors and position the headliner wiring harness aside.
-
On LH side.
Disconnect the electrical connector and position the headliner wiring harness aside.
-
On both sides.
Remove the sunvisor.
-
Remove the sun visor cover.
-
Remove the screws.
-
Rotate outward to remove the sun visor.
-
On both sides.
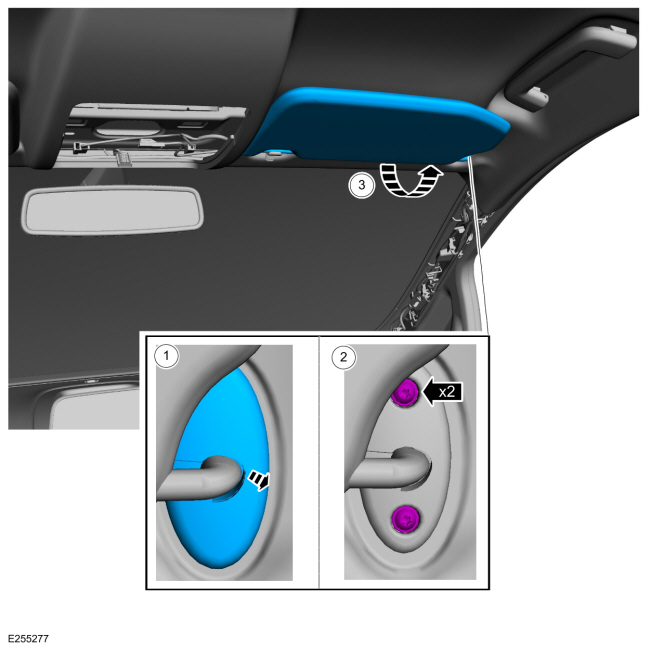
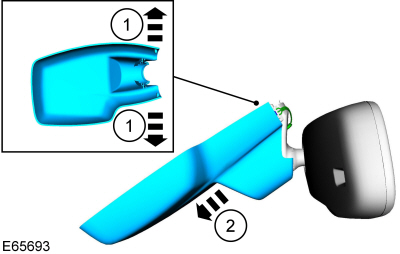
Remove the sun visor clip.
-
Open up the sun visor clip cover.
-
Remove the screw.
-
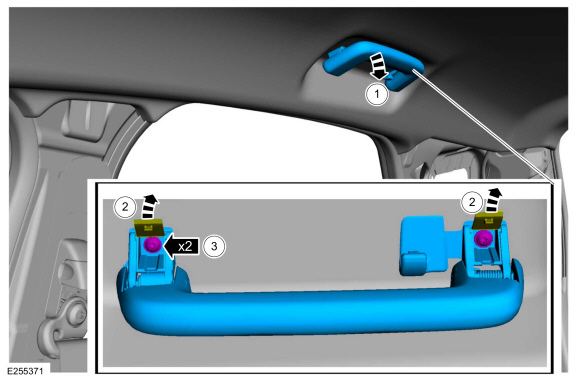
If equipped, on RH side.
Remove the front assist handle.
-
Position the front assist handle down.
-
Open the covers.
-
Remove the screws.
-
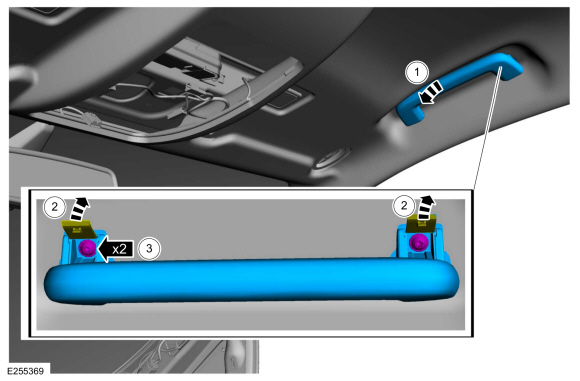
If equipped, on both sides.
Remove the rear assist handle.
-
Position the rear assist handle down.
-
Open the covers.
-
Remove the screws.
-
On both sides.
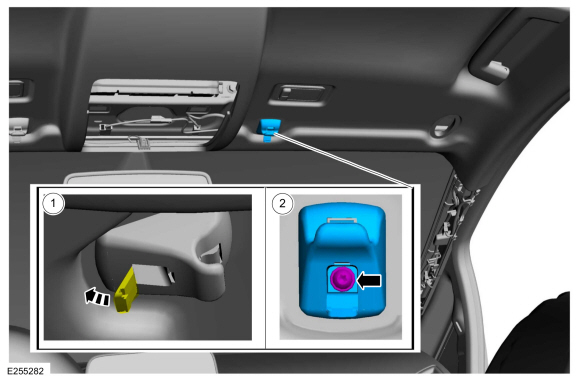
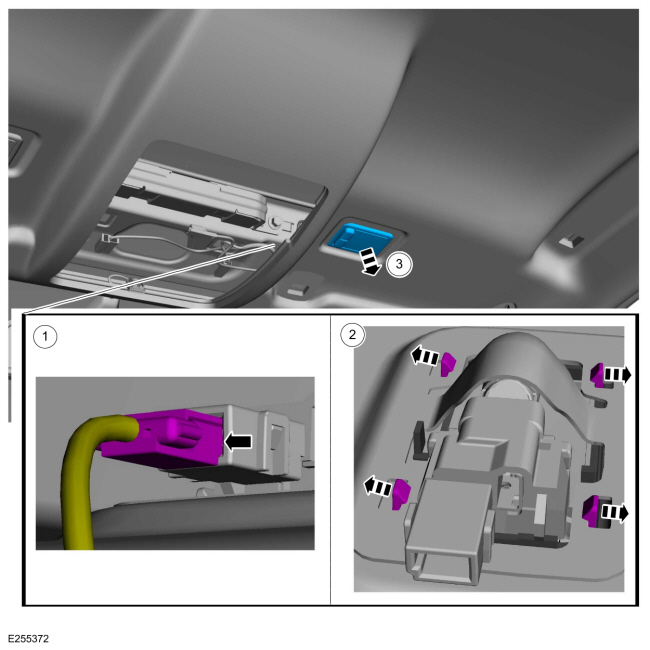
Remove the interior front lamp.
-
Disconnect the electrical connector.
-
Release the tabs.
-
Pull downward to remove.
-
If equipped with autolamps and rain senor.
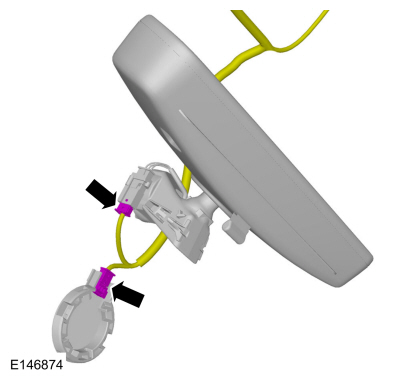
Remove rear view mirror upper cover.
-
Pressing inward, release the side tabs.
-
Sliding toward the rear of the vehicle, to remove.
-
If equipped with autolamps and rain senor.
Remove the rear view mirror lower cover.
-
Pulling outward, release the side tabs.
-
Sliding toward the front of the vehicle, to remove.
-
If equipped with autolamps and rain senor.
Disconnect the rain senor and rear view mirror electrical connectors.
-
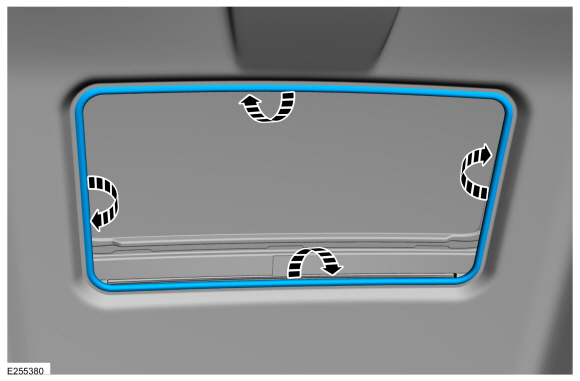
If equipped with roof opening panel.
Disconnect the roof opening panel motor electrical connector.
-
If equipped with roof opening panel.
Remove the roof opening panel trim ring.
-
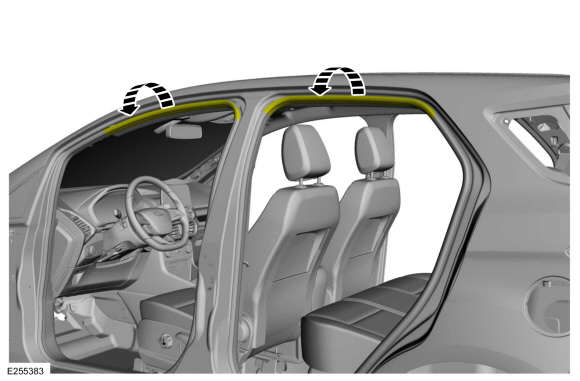
On both sides.
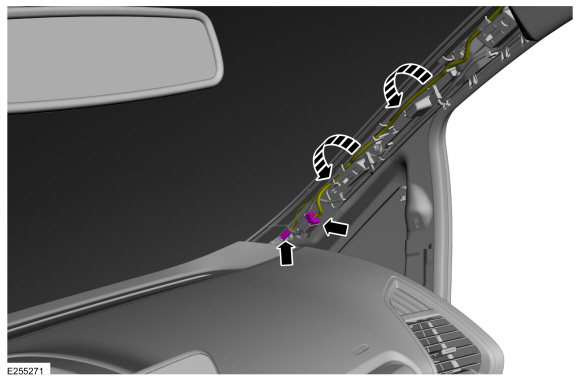
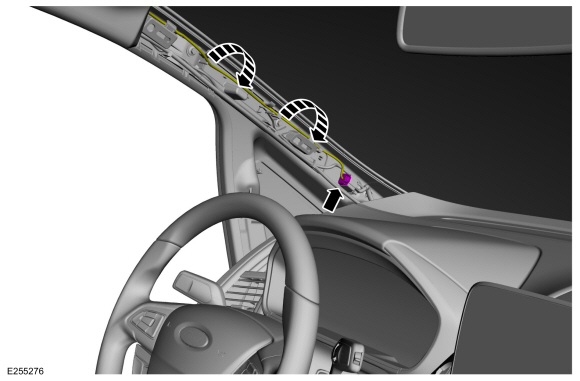
Position the front and rear door weatherstrip aside.
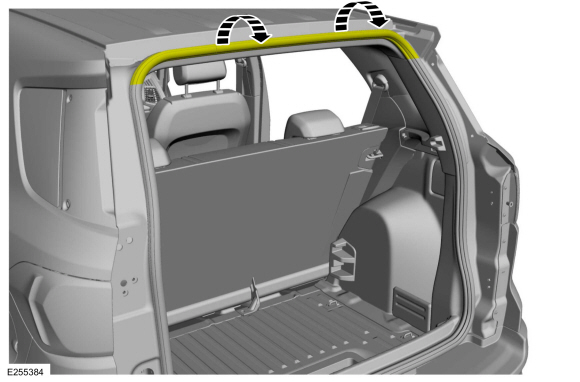
-
Position the liftgate weatherstrip aside.
-
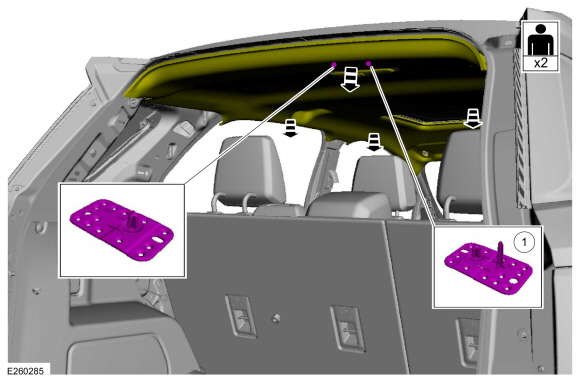
Release the rear clips and lower the headliner.
Materials
Name
Specification
3M™ Super-Fast Repair Adhesive04747
-
Removal
Remove the following items:
On both sides...
Removal
NOTE:
RH shown, LH similar.
NOTE:
Removal steps in this procedure may contain installation details.
Remove the D-pillar trim panel...
Other information:
Special Tool(s) /
General Equipment
303-328
(T88P-6701-B1)
Replacer, Rear SealTKIT-1988-FLMTKIT-1988-FTKIT-1988-LM
Oil Drain Equipment
Materials
Name
Specification
Motorcraft® Silicone Gasket and SealantTA-30
WSE-M4G323-A4
Removal
Remove the flexplate...
Special Tool(s) /
General Equipment
303-1565Alignment Tool, CamshaftTKIT-2010C-FLM
303-507Timing Peg, Crankshaft TDCTKIT-2001N-FLMTKIT-2001N-ROW
Feeler Gauge
Materials
Name
Specification
Flange SealantCU7Z-19B508-A
WSS-M2G348-A11
Removal
NOTICE:
During engine repair procedures, cleanliness is extremely
important..
 Removal and Installation - Headliner
 Removal and Installation - Loadspace Trim Panel
 205-153
(T80T-4000-W)
205-153
(T80T-4000-W)
 205-990