Ford Ecosport: Instrument Panel and Console / Removal and Installation - Floor Console
Special Tool(s) / General Equipment
| Interior Trim Remover |
Removal
NOTE: Removal steps in this procedure may contain installation details.
NOTE: Console with arm rest shown, console without arm rest similar.
-
Remove the front seats.
Refer to: Front Seat (501-10A Front Seats, Removal and Installation).
Vehicles with automatic transmission
-
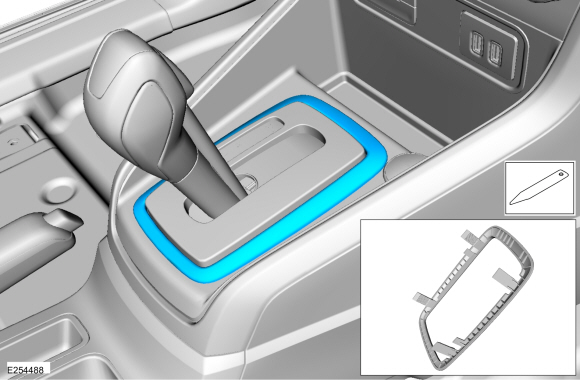
Remove the selector lever trim panel.
Use the General Equipment: Interior Trim Remover
 |
All vehicles
-
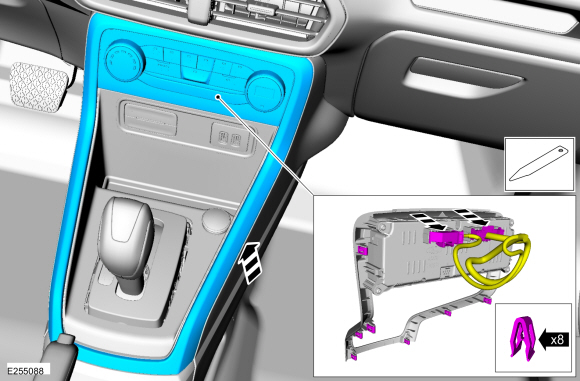
Remove the floor console upper trim panel.
-
Disconnect the electrical connectors.
Use the General Equipment: Interior Trim Remover
-
Disconnect the electrical connectors.
 |
Vehicles with automatic transmission
-
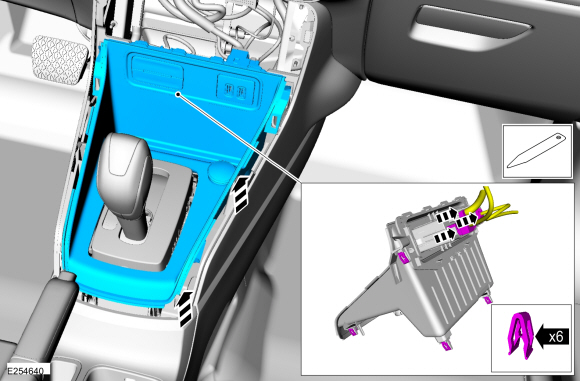
Remove the selector lever finish panel.
-
Disconnect the electrical connectors.
Use the General Equipment: Interior Trim Remover
-
Disconnect the electrical connectors.
 |
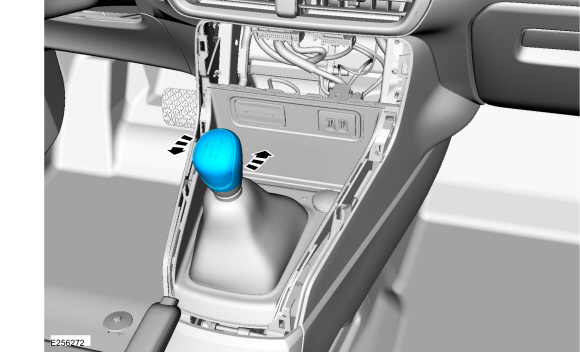
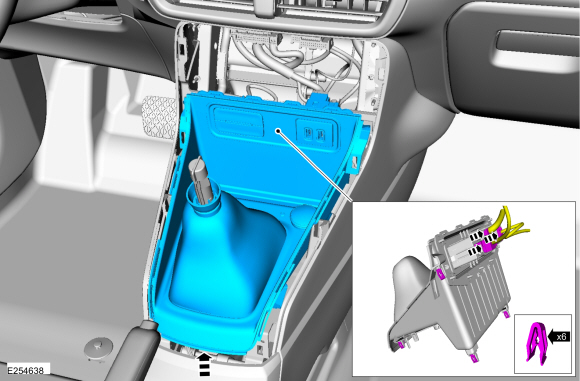
Vehicles with manual transmission
-
Remove the selector lever knob.
 |
-
Remove the selector lever finish panel.
-
Disconnect the electrical connectors.
-
Disconnect the electrical connectors.
 |
All vehicles
-
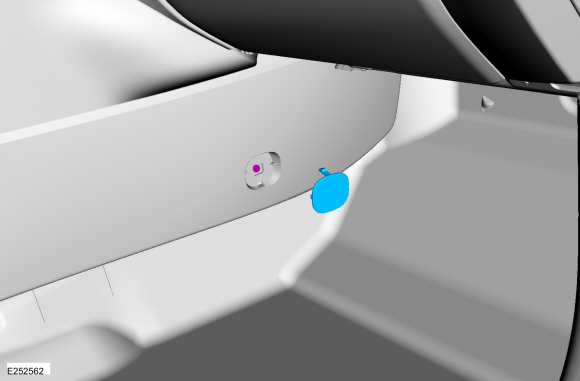
Remove the RH cover and bolt.
Torque: 36 lb.in (4.1 Nm)
 |
-
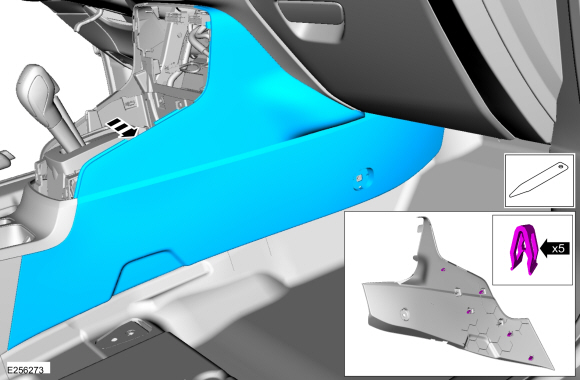
NOTE: When installing the RH floor console front trim panel be careful as to not damage the panel while inserting it into the floor console upper finish panel.
Remove the RH floor console front trim panel.
 |
-
Remove the LH cover and bolt.
Torque: 36 lb.in (4.1 Nm)
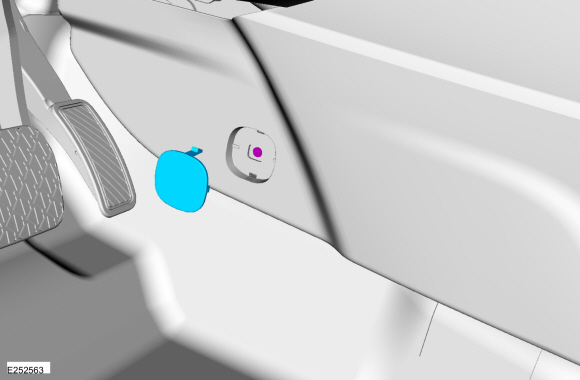 |
-
NOTE: . When installing the LH floor console front trim panel be careful as to not damage the panel while inserting it into the floor console upper finish panel.
Remove the LH floor console front trim panel.
Use the General Equipment: Interior Trim Remover
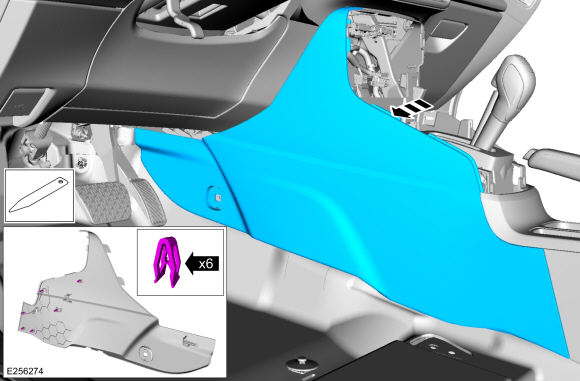 |
-
NOTE: If equipped.
Open the floor console arm rest.
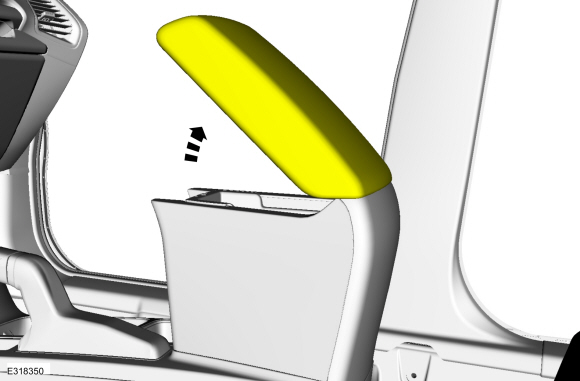 |
-
NOTE: If equipped.
Remove the tray.
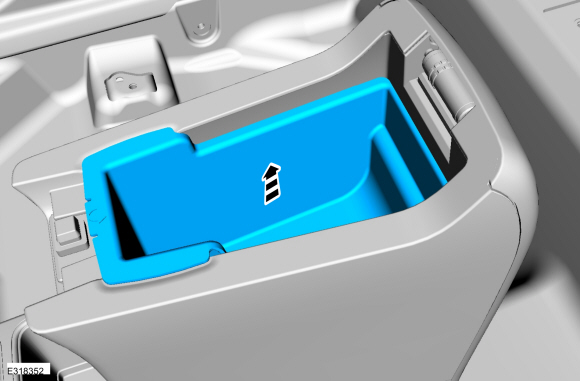 |
-
NOTE: If equipped.
Remove the floor console rear trim panel.
-
Disconnect the electrical connector.
Use the General Equipment: Interior Trim Remover
-
Disconnect the electrical connector.
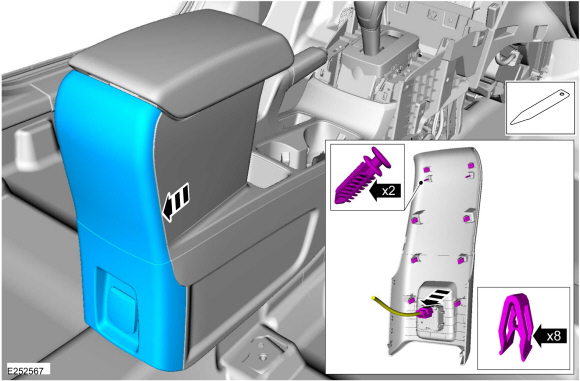 |
-
NOTE: If equipped.
Release the clips and remove the trim panel.
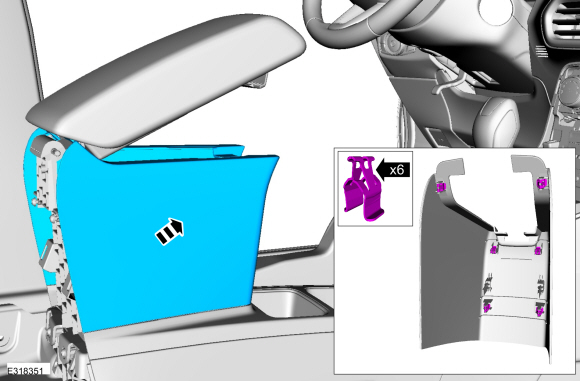 |
-
Release the clips and remove the floor console upper finish panel.
-
Disconnect the electrical connectors.
-
Disconnect the electrical connectors.
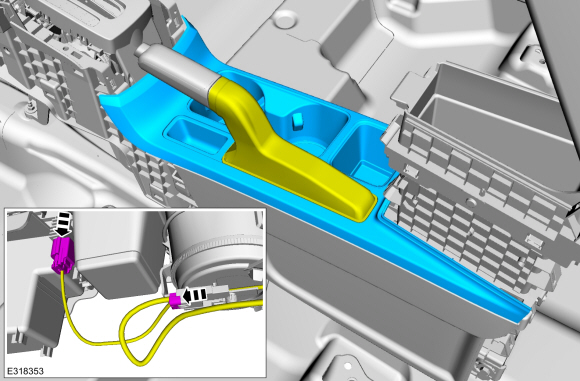 |
-
-
Position the park brake lever boot upward.
-
Rotate the park brake lever boot so that it fit
through the opening in the floor console upper finish panel.
-
Position the park brake lever boot upward.
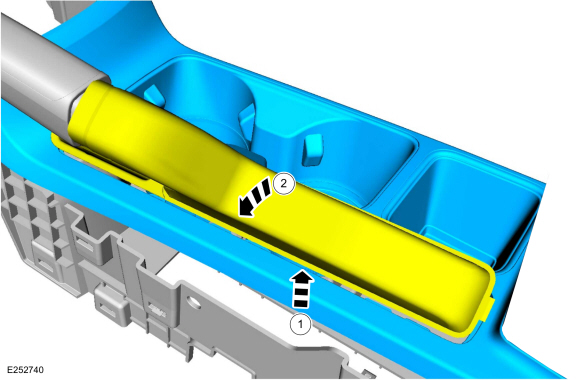 |
-
Release the harness retainers and postion aside the harness.
-
Remove the front floor console bolts.
Torque: 22 lb.in (2.5 Nm)
-
Remove the rear floor console bolts and the floor console.
Torque: 36 lb.in (4.1 Nm)
-
Remove the front floor console bolts.
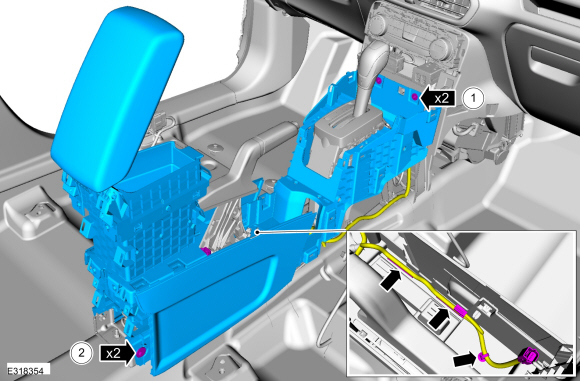 |
Installation
-
To install, reverse the removal procedure.
 Removal and Installation - Auxiliary Power Point
Special Tool(s) /
General Equipment
501-194Remover, Power PointTKIT-2014D-ROW2TKIT-2014D-FL_ROW
Removal
Open the power point cover...
 Removal and Installation - Glove Compartment
Removal
Open the glove compartment.
Release the golve compartment stops and remove the dampener...
Other information:
Ford Ecosport 2014-2026 Service and Repair Manual: Diagnosis and Testing - Parking Brake
Symptom Chart(s) Symptom Chart: Parking Brake and Actuation Diagnostics in this manual assume a certain skill level and knowledge of Ford-specific diagnostic practices.REFER to: Diagnostic Methods (100-00 General Information, Description and Operation)...
Ford Ecosport 2014-2026 Service and Repair Manual: Description and Operation - Passive Anti-Theft System (PATS) - Overview
Overview PATS uses the following main components: BCM PATS center antenna PATS front antenna Passive key PCM Keyless entry rear antenna Start/Stop Switch When the START/STOP button is pressed, the key data is read by a PATS antenna...
Categories
- Manuals Home
- 2nd Gen Ford Ecosport Service Manual (2014 - 2026)
- Description and Operation - Jacking and Lifting - Overview
- Removal and Installation - Transmission
- Removal and Installation - Fuel Pump and Sender Unit
- Removal and Installation - Evaporative Emission Canister Purge Valve
- Description and Operation - Evaporative Emissions - System Operation and Component Description
Removal and Installation - Steering Column Shaft
Removal
NOTE: Removal steps in this procedure may contain installation details.
NOTICE: Do not allow the steering column to rotate while the steering column shaft is disconnected or damage to the steering column internal sensor may result.
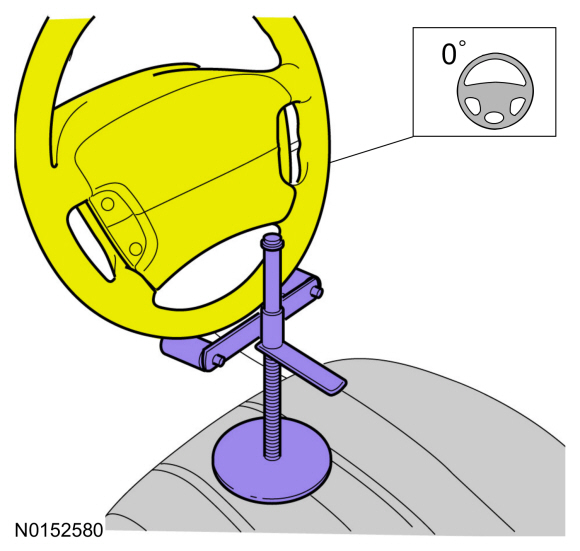
NOTE: Use a steering wheel holding device (such as Hunter® 28-75-1 or equivalent)
Hold the steering wheel in the straight-ahead position.