Ford Ecosport: Body Closures / Removal and Installation - Fuel Filler Door Assembly
Ford Ecosport 2014-2026 Service and Repair Manual / Body and Paint / Body Closures / Removal and Installation - Fuel Filler Door Assembly
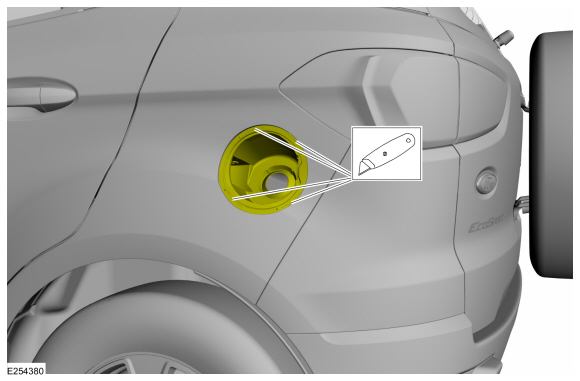
Special Tool(s) / General Equipment
| Flat Headed Screw Driver | |
| Knife |
Removal
NOTE: Removal steps in this procedure may contain installation details.
NOTE: The fuel filler door assembly is damaged during the removal process and requires a new fuel filler door assembly installed.
-
Remove the fuel filler door.
Refer to: Fuel Filler Door (501-03 Body Closures, Removal and Installation).
-
Remove the fuel tank filler pipe.
Refer to: Fuel Tank Filler Pipe (310-01C Fuel Tank and Lines - 2.0L Duratec-HE (129kW/175PS), Removal and Installation).
Refer to: Fuel Tank Filler Pipe (310-01C Fuel Tank and Lines - 2.0L Duratec-HE (129kW/175PS), Removal and Installation).
-
Using a knife, slice the holes in the indicated areas.
Use the General Equipment: Knife
 |
-
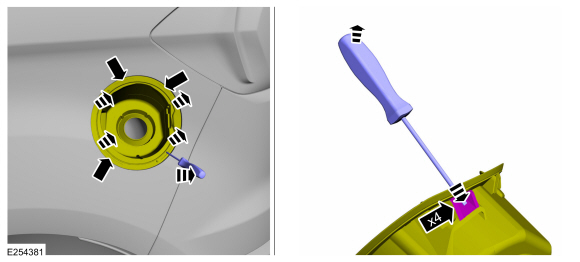
Insert the screwdriver and release the clips while pulling the fuel filler door housing away from the vehicle.
Use the General Equipment: Flat Headed Screw Driver
 |
-
NOTE: Clearance is limited. When all four clips release, the fuel filler door housing can be rotated.
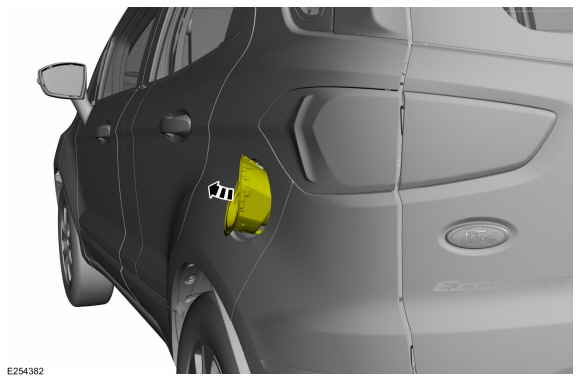
Rotate the fuel filler door housing.
 |
-
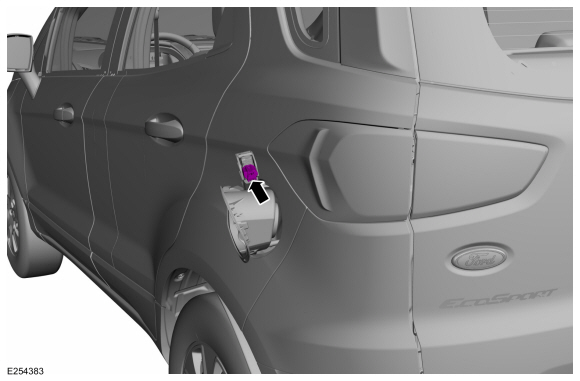
Disconnect the electrical connector.
 |
-
Remove the drain tube.
 |
-
Pull the fuel filler door housing away from the vehicle and remove.
 |
Installation
-
To install, reverse the removal procedure.
 Removal and Installation - Fuel Filler Door
Special Tool(s) /
General Equipment
Flat-Bladed Screwdriver
Removal
NOTE:
Removal steps in this procedure may contain installation details...
 Removal and Installation - Hood Hinge
Removal
NOTE:
Removal steps in this procedure may contain installation details.
NOTE:
LH side shown, RH side similar.
Remove the hood...
Other information:
Ford Ecosport 2014-2026 Service and Repair Manual: Removal and Installation - Rear Lamp Mounting Panel
Special Tool(s) / General Equipment 8 mm Drill Bit MIG/MAG Welding Equipment Spot Weld Drill Bit Locking Pliers Materials Name Specification Seam SealerTA-2-B, 3M™ 08308, LORD Fusor® 803DTM - Removal NOTE: Factory welds may be substituted with resistance or metal inert gas (MIG) plug welds...
Ford Ecosport 2014-2026 Service and Repair Manual: General Procedures - Piston Inspection
Inspection NOTE: Do not use a caustic cleaning solution or a wire brush to clean the pistons or damage can occur. Clean and inspect the (1) ring lands, (2) pin bosses, (3) skirts and the (4) tops of the pistons. If wear marks, scores or glazing is found on the piston skirt, check for a bent or twisted connecting rod...
Categories
- Manuals Home
- 2nd Gen Ford Ecosport Service Manual (2014 - 2026)
- Removal and Installation - Front Seat
- Removal and Installation - Roof Rail
- Body and Paint
- Description and Operation - Jacking and Lifting - Overview
- Removal and Installation - Evaporative Emission Canister Purge Valve
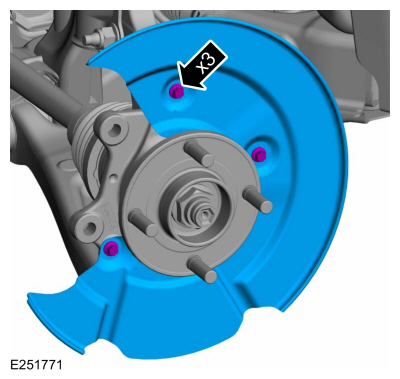
Removal and Installation - Brake Disc Shield
Removal
NOTE: Removal steps in this procedure may contain installation details.
Remove the brake disc.Refer to: Brake Disc (206-03 Front Disc Brake, Removal and Installation).
Remove the bolts and brake disc.
Torque: 80 lb.in (9 Nm)
Copyright © 2026 www.foecosport2.com