Ford Ecosport: Engine Cooling - 2.0L Duratec-HE (129kW/175PS) / Removal and Installation - Degas Bottle
Special Tool(s) / General Equipment
| Fluid Suction Gun | |
| Hose Clamp Remover/Installer | |
| Locking Pliers |
Materials
| Name | Specification |
|---|---|
| Motorcraft® Orange Prediluted Antifreeze/Coolant VC-3DIL-B |
WSS-M97B44-D2 |
Removal
 WARNING:
Always allow the engine to cool before opening the cooling
system. Do not unscrew the coolant pressure relief cap when the engine
is operating or the cooling system is hot. The cooling system is under
pressure; steam and hot liquid can come out forcefully when the cap is
loosened slightly. Failure to follow these instructions may result in
serious personal injury.
WARNING:
Always allow the engine to cool before opening the cooling
system. Do not unscrew the coolant pressure relief cap when the engine
is operating or the cooling system is hot. The cooling system is under
pressure; steam and hot liquid can come out forcefully when the cap is
loosened slightly. Failure to follow these instructions may result in
serious personal injury.
NOTE: Removal steps in this procedure may contain installation details.
-
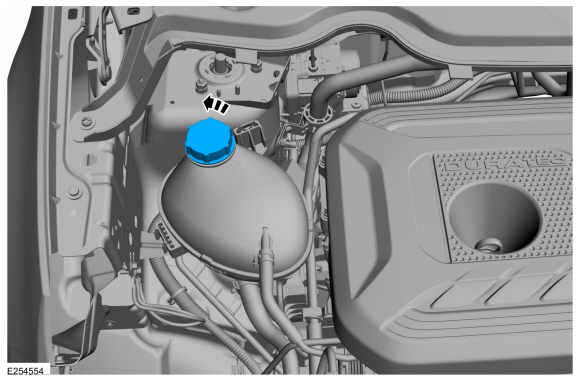
Release the cooling system pressure by slowly turning
the degas bottle cap between 2 and 3 turns and remove the degas bottle
cap.
 |
-
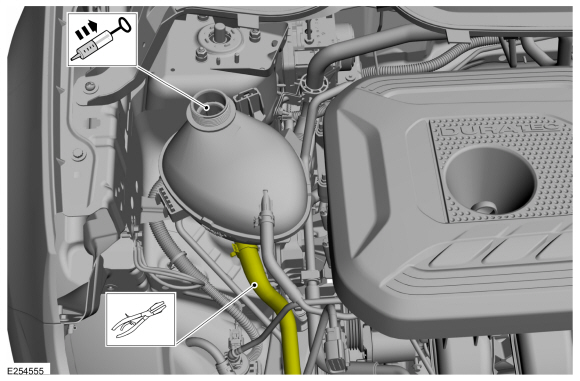
Using general tools, clamp the lower coolant hose and syphon the engine coolant from the degas bottle.
Use the General Equipment: Fluid Suction Gun
Use the General Equipment: Locking Pliers
 |
-
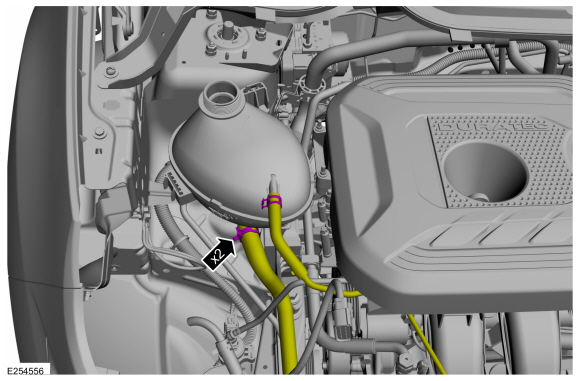
Release the clamps and disconnect the coolant hoses.
Use the General Equipment: Hose Clamp Remover/Installer
 |
-
Release the tabs and remove the degas bottle.
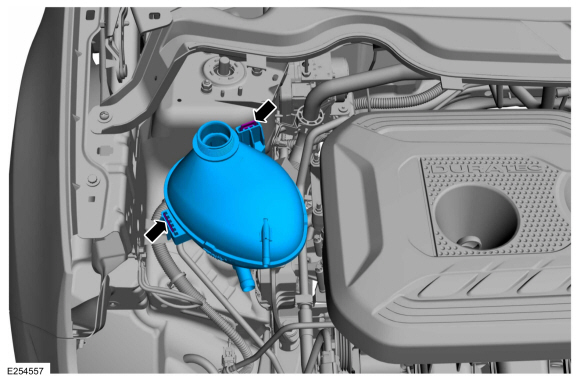 |
Installation
-
To install, reverse the removal procedure.
-
Fill the degas bottle with the recommended coolant mixture and fill level.
Material: Motorcraft® Orange Prediluted Antifreeze/Coolant / VC-3DIL-B (WSS-M97B44-D2)
 Removal and Installation - Cooling Fan Motor and Shroud
Special Tool(s) /
General Equipment
Hose Clamp Remover/Installer
Removal
NOTE:
Removal steps in this procedure may contain installation details...
 Removal and Installation - Heater Hoses
Removal
NOTE:
Removal steps in this procedure may contain installation details.
Remove the engine appearance cover.
Remove the battery tray...
Other information:
Ford Ecosport 2014-2026 Service and Repair Manual: Removal and Installation - Crankshaft Position (CKP) Sensor
Special Tool(s) / General Equipment 303-1521Alignment Tool, Crankshaft Position SensorTKIT-2010C-FLM 303-507Timing Peg, Crankshaft TDCTKIT-2001N-FLMTKIT-2001N-ROW Ford Diagnostic Equipment Removal NOTE: Do not loosen or remove the crankshaft pulley bolt without first installing the special tools as instructed in this procedure...
Ford Ecosport 2014-2026 Service and Repair Manual: Removal and Installation - Rear Fender Splash Shield
Removal NOTE: Removal steps in this procedure may contain installation details. NOTE: LH side shown, RH side similar. Disengage the pushpin and the clips, position aside the rocker panel moulding. Remove the pushpin and the retainers...
Categories
- Manuals Home
- 2nd Gen Ford Ecosport Service Manual (2014 - 2026)
- General Procedures - Transmission Fluid Level Check
- Removal and Installation - Starter Motor
- Description and Operation - Evaporative Emissions - System Operation and Component Description
- Body and Paint
- Removal and Installation - Fuel Pump and Sender Unit
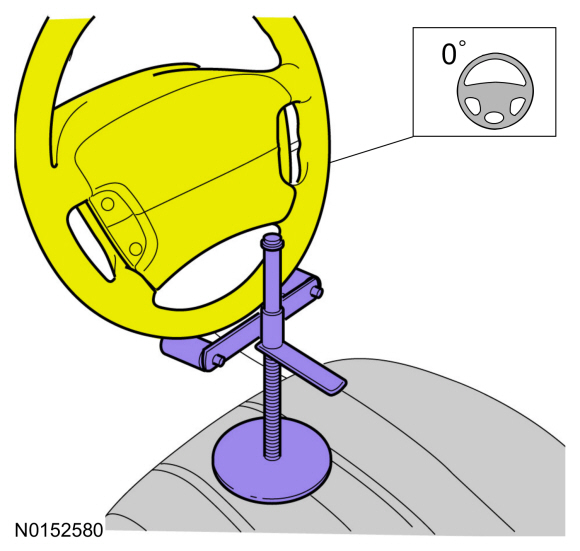
Removal and Installation - Steering Column Shaft
Removal
NOTE: Removal steps in this procedure may contain installation details.
NOTICE: Do not allow the steering column to rotate while the steering column shaft is disconnected or damage to the steering column internal sensor may result.
NOTE: Use a steering wheel holding device (such as Hunter® 28-75-1 or equivalent)
Hold the steering wheel in the straight-ahead position.