Ford Ecosport: Side Panel Sheet Metal Repairs / Removal and Installation - Front Door Skin Panel
Ford Ecosport 2014-2026 Service and Repair Manual / Body and Paint / Side Panel Sheet Metal Repairs / Removal and Installation - Front Door Skin Panel
Special Tool(s) / General Equipment
| Grinder | |
| Hot Air Gun | |
| Knife | |
| Locking Pliers |
Materials
| Name | Specification |
|---|---|
| Metal Bonding Adhesive TA-1, TA-1-B, 3M™ 08115, LORD Fusor® 108B, Henkel Teroson EP 5055 |
- |
| Seam Sealer TA-2-B, 3M™ 08308, LORD Fusor® 803DTM |
- |
| Flexible Foam Repair 3M™ 08463, LORD Fusor® 121 |
- |
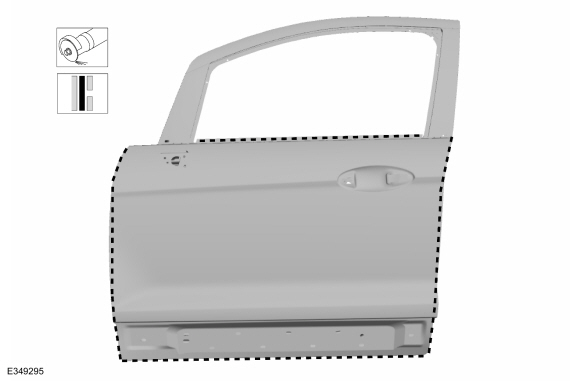
Removal
NOTE: Left hand (LH) side shown, right hand (RH) side similar.
-
Inspect the upper and lower door hinges for wear or damage, install new or rebuild as necessary.
 |
-
Remove the exterior mirror.
Refer to: Exterior Mirror (501-09 Rear View Mirrors, Removal and Installation).
-
Remove the front door window regulator.
Refer to: Front Door Window Regulator (501-11 Glass, Frames and Mechanisms, Removal and Installation).
-
Remove the front door.
Refer to: Front Door (501-03 Body Closures, Removal and Installation).
-
Remove the front door exterior trim.
Refer to: Front Door Moulding (501-08 Exterior Trim and Ornamentation, Removal and Installation).
-
Remove the front door upper moulding.
Refer to: Front Door Upper Moulding (501-08 Exterior Trim and Ornamentation, Removal and Installation).
-
Remove the front door latch.
Refer to: Front Door Latch (501-14 Handles, Locks, Latches and Entry Systems, Removal and Installation).
-
Remove the door module.
Refer to: Driver Door Module (DDM) (419-10 Multifunction Electronic Modules, Removal and Installation).
-
Remove the front door speaker.
Refer to: Front Door Speaker (415-00 Information and Entertainment System - General Information, Removal and Installation).
-
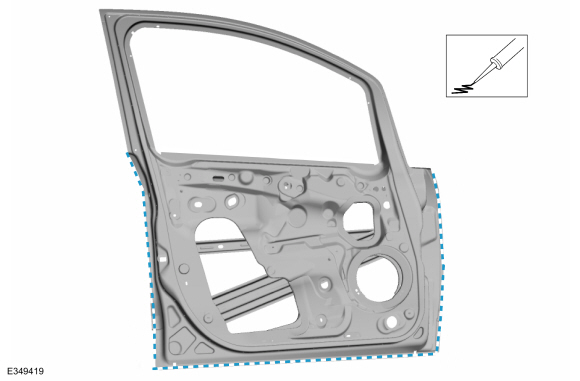
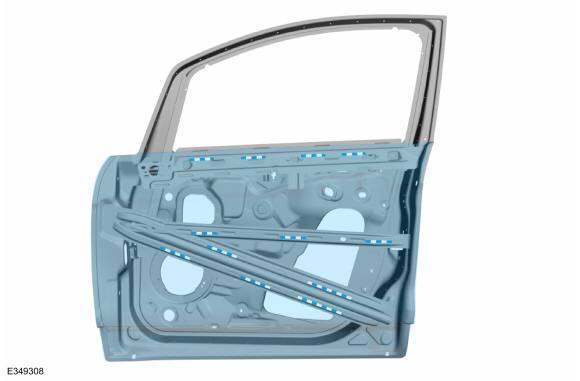
Carefully cut through the outer panel only.
Use the General Equipment: Grinder
 |
-
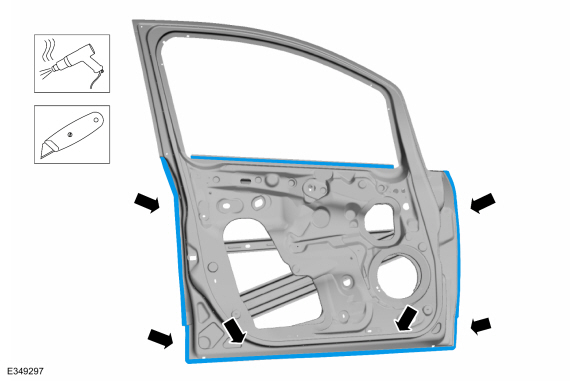
Remove the front door skin panel.
Use the General Equipment: Hot Air Gun
Use the General Equipment: Knife
 |
-
Remove the remaining portion of the door skin panel.
Use the General Equipment: Hot Air Gun
Use the General Equipment: Knife
 |
Installation
NOTE: Left hand (LH) side shown, right hand (RH) side similar.
-
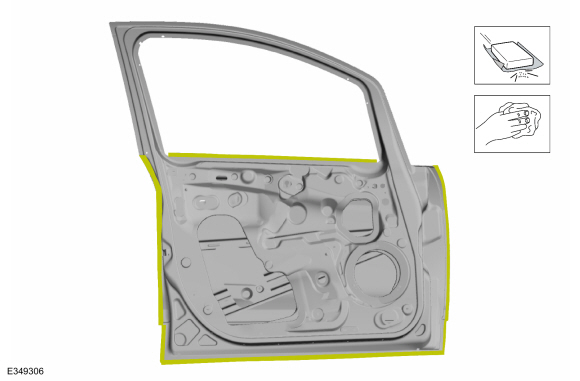
Sand to remove e-coat from the mating surface of the door skin and clean.
 |
-
Sand to remove all adhesive and foreign materials from the door shell to door skin mating surfaces and clean.
 |
-
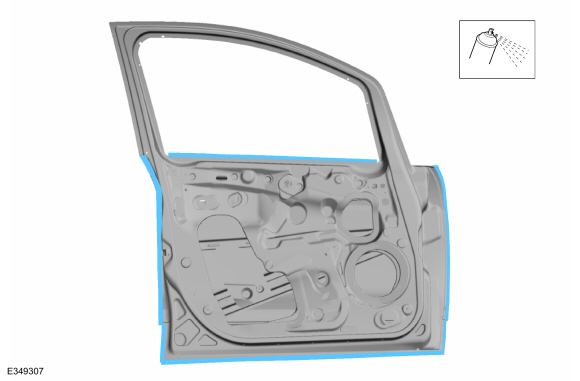
NOTE: Hem closing and panel alignment must be completed before the adhesive has begun to cure.
Apply adhesive.
Material: Metal Bonding Adhesive / TA-1, TA-1-B, 3M™ 08115, LORD Fusor® 108B, Henkel Teroson EP 5055
 |
-
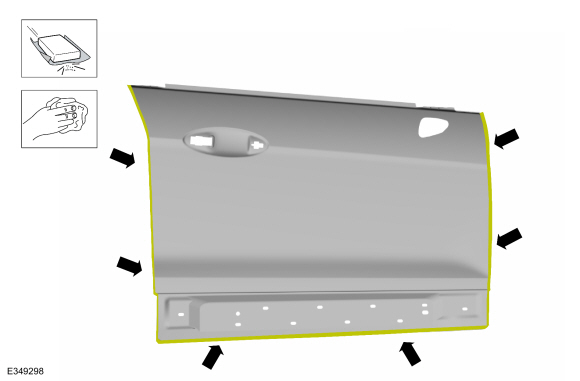
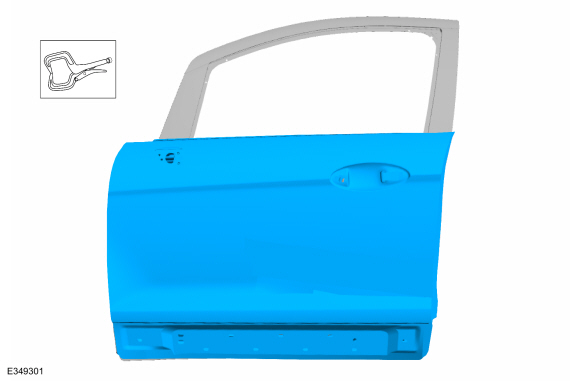
Install the outer door skin panel and lightly clamp.
Using a hammer and dolly or door skin installation tool, partially close
the door hem flange around the perimeter of the door assembly.
Use the General Equipment: Locking Pliers
 |
-
Install the door and check for proper alignment, Adjust as necessary.
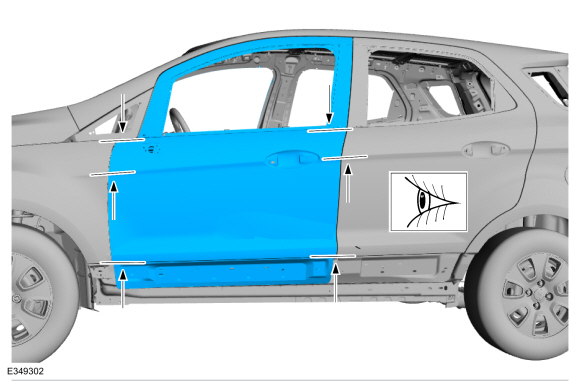 |
-
Remove the door from the vehicle.
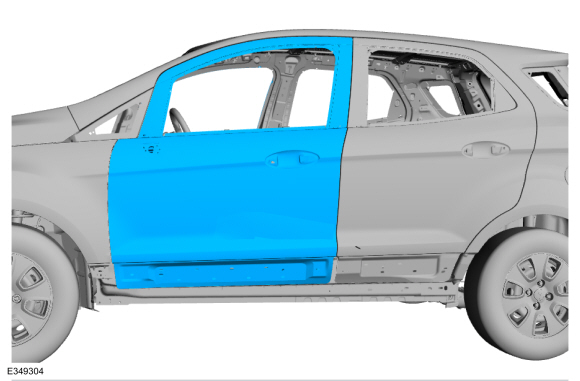 |
-
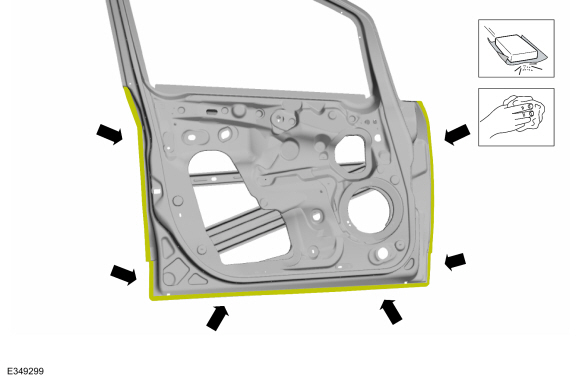
Using a hammer and dolly or door skin installation tool,
complete the flanging process around the door assembly perimeter.
Smooth any residual adhesive squeeze-out in to the hem flange seam to
act as a sealer.
 |
-
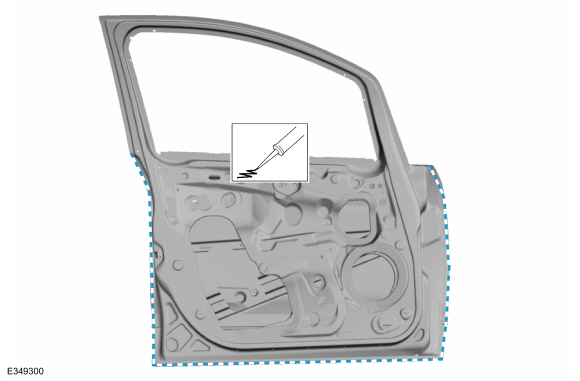
Apply expandable NVH foam sealant as indicated.
Material: Flexible Foam Repair / 3M™ 08463, LORD Fusor® 121
 |
-
Sand and clean the door hem flange area.
 |
-
Prime the door flange area using a Ford approved paint system.
 |
-
Seam Sealing:All seams must be sealed to production level.
Material: Seam Sealer / TA-2-B, 3M™ 08308, LORD Fusor® 803DTM
 |
-
Refinish the door hem area using a Ford approved paint system.
|
-
Refinish the repair using a Ford approved paint system and typical refinishing techniques.
-
Restore corrosion protection.
Refer to: Corrosion Prevention (501-25 Body Repairs - General Information, General Procedures).
-
Install front door speaker.
Refer to: Front Door Speaker (415-00 Information and Entertainment System - General Information, Removal and Installation).
-
Install the door module.
Refer to: Driver Door Module (DDM) (419-10 Multifunction Electronic Modules, Removal and Installation).
-
Install the front door latch.
Refer to: Front Door Latch (501-14 Handles, Locks, Latches and Entry Systems, Removal and Installation).
-
Install the front door upper moulding.
Refer to: Front Door Upper Moulding (501-08 Exterior Trim and Ornamentation, Removal and Installation).
-
Install the front door exterior trim.
Refer to: Front Door Moulding (501-08 Exterior Trim and Ornamentation, Removal and Installation).
-
Install the front door window regulator.
Refer to: Front Door Window Regulator (501-11 Glass, Frames and Mechanisms, Removal and Installation).
-
Install the exterior mirror.
Refer to: Exterior Mirror (501-09 Rear View Mirrors, Removal and Installation).
-
Install the door.
Refer to: Front Door (501-03 Body Closures, Removal and Installation).
-
Align the door.
Refer to: Front Door Alignment (501-03 Body Closures, General Procedures).
 Removal and Installation - A-Pillar Assembly
Special Tool(s) /
General Equipment
Resistance Spotwelding Equipment
Hot Air Gun
8 mm Drill Bit
MIG/MAG Welding Equipment
Spot Weld Drill Bit
Materials
Name
Specification
Adhesive
-
Removal
Remove the A-Pillar Outer Panel...
 Removal and Installation - Rear Door Skin Panel
Special Tool(s) /
General Equipment
Grinder
Hot Air Gun
Knife
Locking Pliers
Materials
Name
Specification
Metal Bonding AdhesiveTA-1, TA-1-B, 3M™ 08115, LORD Fusor® 108B, Henkel Teroson EP 5055
-
Seam SealerTA-2-B, 3M™ 08308, LORD Fusor® 803DTM
-
Flexible Foam Repair3M™ 08463, LORD Fusor® 121
-..
Other information:
Ford Ecosport 2014-2026 Service and Repair Manual: Removal and Installation - Exterior Rear Door Handle
Removal NOTE: LH side shown, RH side similar. Remove the access plug and the exterior rear door handle retaining screw. Remove the access plug from the rear door. Remove the exterior rear door handle retaining screw. Remove the exterior rear door handle cover. ..
Ford Ecosport 2014-2026 Service and Repair Manual: Description and Operation - Anti-Lock Brake System (ABS) and Stability Control - Overview
Overview The ABS and stability control systems are comprised of the following subsystems which assist the driver in maintaining control of the vehicle: ABS EBA EBD ESC Hill start assist Traction control The ABS helps maintain steering control by preventing the wheels from locking up during hard braking...
Categories
- Manuals Home
- 2nd Gen Ford Ecosport Service Manual (2014 - 2026)
- Diagnosis and Testing - Body Control Module (BCM)
- Removal and Installation - Catalytic Converter
- Diagnosis and Testing - Evaporative Emissions
- Removal and Installation - Starter Motor
- Removal and Installation - Evaporative Emission Canister Purge Valve
Removal and Installation - Rear Halfshaft Seal
Special Tool(s) / General Equipment
 205-153
(T80T-4000-W)
205-153
(T80T-4000-W)
Handle
 205-990
Installer, Axle Seal
TKIT-2012A-FL
TKIT-2012A-ROW
Copyright © 2026 www.foecosport2.com