Ford Ecosport: Automatic Transmission External Controls / Removal and Installation - Selector Lever Cable - 6-Speed Automatic Transmission – 6F35
Removal
-
With the vehicle in N , position it on a hoist.
Refer to: Jacking and Lifting - Overview (100-02 Jacking and Lifting, Description and Operation).
-
Remove the air cleaner.
Refer to: Air Cleaner (303-12C Intake Air Distribution and Filtering -
2.0L Duratec-HE (129kW/175PS), Removal and Installation).
-
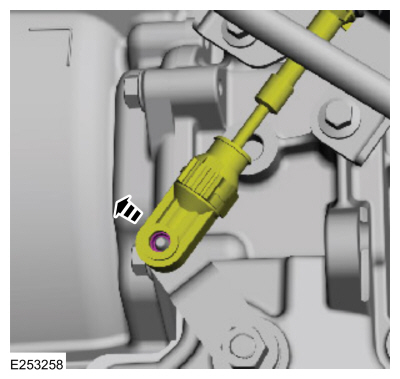
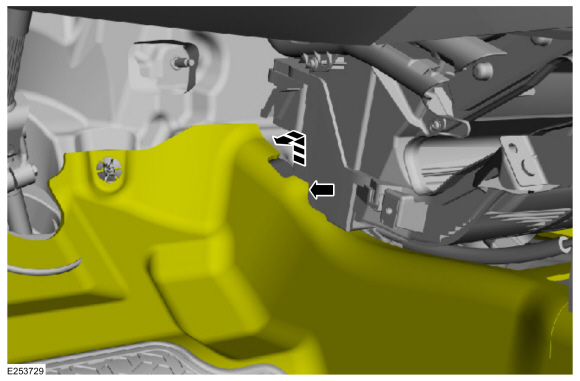
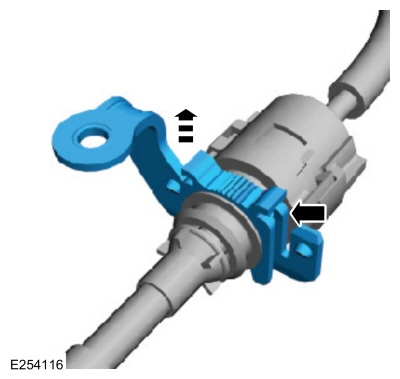
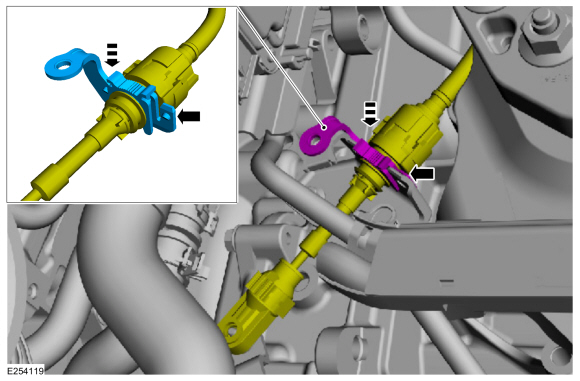
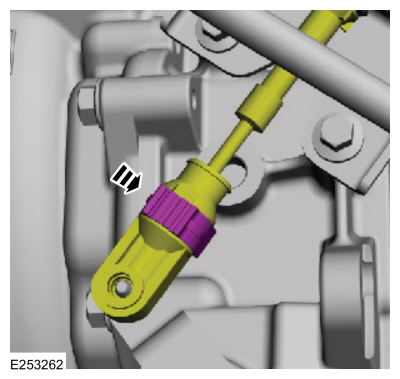
Disconnect the selector lever cable from the transmission manual lever.
-
Remove the selector lever cable clip bolt.
-
Disconnect the selector lever cable from the transmission. Remove the clip from the selector lever cable.
-
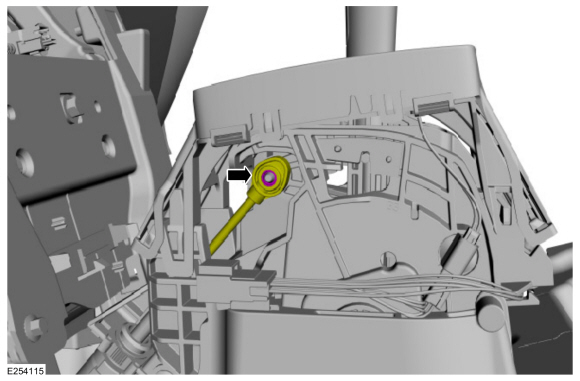
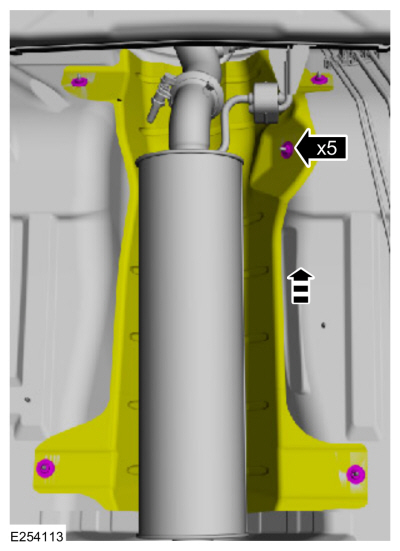
Remove the nuts and position the heat shield aside.
-
Remove the grommet nuts.
-
Remove the floor console.
Refer to: Floor Console (501-12 Instrument Panel and Console, Removal and Installation).
-
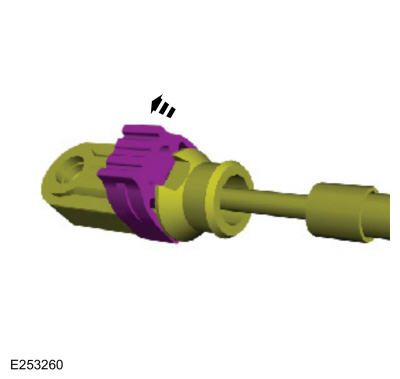
NOTICE:
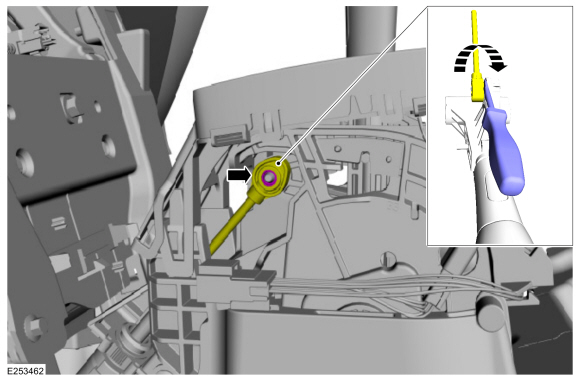
Do not pull or pry on the selector lever cable or
the selector lever cable end may be damaged. Use a screwdriver and turn
the screwdriver as shown to pry the cable end off the post as close to
the post as possible.
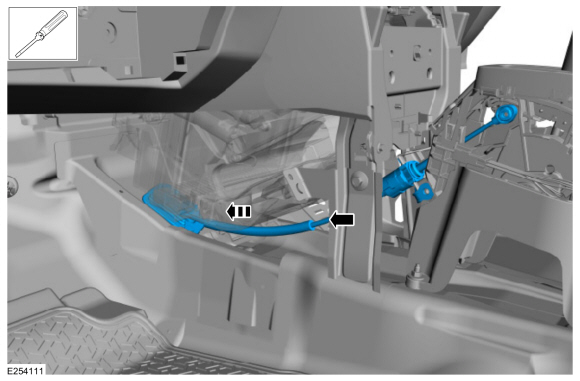
Using a screwdriver, pry the selector lever cable end from the selector lever mechanism.
-
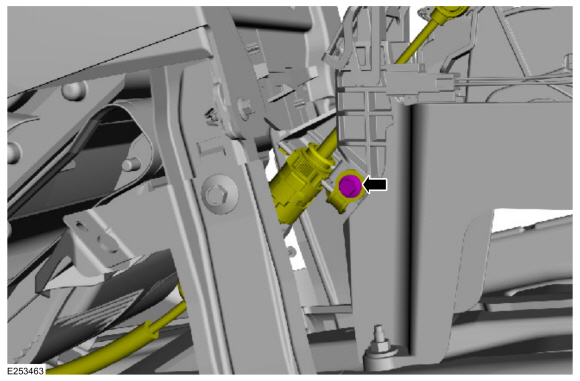
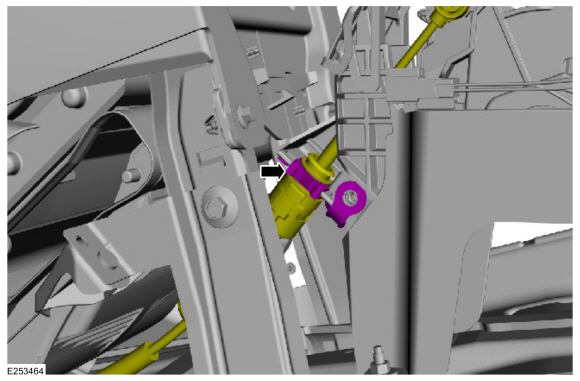
Remove the selector lever cable retaining clip bolt.
-
Disconnect the selector lever cable clip and the selector lever cable from the selector lever.
-
Position the carpet aside.
-
NOTE:
If necessary, use a screwdriver to pry the grommet out of the floor pan past the HVAC housing.
Remove the selector lever cable.
Installation
-
NOTE:
If necessary.
If necessary, remove the selector lever cable clip from the transmission end of the cable.
-
NOTE:
If necessary, use a screwdriver to pry the grommet past the HVAC housing into the floor pan.
Install the selector lever cable.
-
Position the carpet.
-
Connect the selector lever cable clip and the selector lever cable to the selector lever.
-
Install the selector lever cable retaining clip bolt.
Torque:
62 lb.in (7 Nm)
-
Connect the selector lever cable end to the selector lever mechanism.
-
Install the floor console.
Refer to: Floor Console (501-12 Instrument Panel and Console, Removal and Installation).
-
Install the grommet nuts.
Torque:
80 lb.in (9 Nm)
-
Position the heat shield and install the nuts.
-
Install the clip on the selector lever cable. Connect the selector lever cable to the transmission.
-
Install the selector lever cable clip bolt.
Torque:
62 lb.in (7 Nm)
-
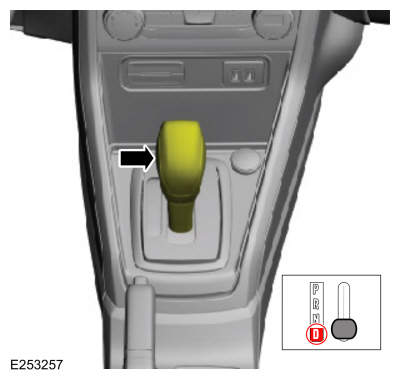
Position the selector lever in D .
-
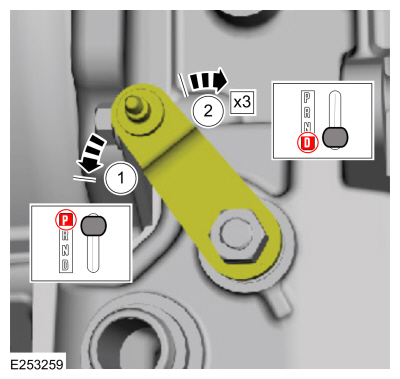
Position the transmission manual lever in D .
-
Rotate the transmission manual lever counterclockwise until it stops.
-
Rotate the transmission manual lever 3 detents into D .
-
Unlock the selector lever cable adjuster.
-
Connect the selector lever cable to the transmission manual lever.
-
Lock the selector lever cable adjuster lock.
-
Install the air cleaner.
Refer to: Air Cleaner (303-12C Intake Air Distribution and Filtering -
2.0L Duratec-HE (129kW/175PS), Removal and Installation).
-
Verify that the engine starts in P and N and that the reverse lamps illuminate in P .
Removal
With the vehicle in N , position it on a hoist.
Refer to: Jacking and Lifting - Overview (100-02 Jacking and Lifting, Description and Operation)...
Removal
NOTE:
Removal steps in this procedure may contain installation details.
Remove the RH steering wheel multifunction switch...
Other information:
Materials
Name
Specification
Motorcraft® MERCON® LV Automatic Transmission FluidXT-10-QLVC
WSS-M2C938-AMERCON® LV,
Connect
With the vehicle in NEUTRAL, position it on a hoist.
Use the Fluid Exchanger to change the fluid...
Programming
NOTE:
A passive key with a depleted battery(ies) only starts the vehicle when
in the backup starting location. The RKE functionality remains
inoperative until the key battery(ies) is replaced.
NOTE:
The diagnostic scan tool must have an active Internet connection...


 Removal and Installation - Selector Lever Cable - 6-Speed Automatic Transmission – 6F15
 Removal and Installation - Upshift Paddle Switch
 205-153
(T80T-4000-W)
205-153
(T80T-4000-W)
 303-103
(T74P-6375-A)
303-103
(T74P-6375-A)
 303-1247
 303-15