
Ford Ecosport: Automatic Transmission - 6-Speed Automatic Transmission – 6F35 / Removal and Installation - Halfshaft Seal RH - FWD
Ford Ecosport 2014-2026 Service and Repair Manual / Automatic Transmission / Automatic Transmission - 6-Speed Automatic Transmission – 6F35 / Removal and Installation - Halfshaft Seal RH - FWD
Special Tool(s) / General Equipment
 |
205-153
(T80T-4000-W)
Handle |
 |
307-718 Installer, Axle Seal TKIT-2013B-FL TKIT-2013B-ROW |
| Puller | |
| Punch | |
Removal
-
Remove the RH halfshaft.
Refer to: Front Halfshaft RH - 2.0L Duratec-HE (125kW/170PS) – MI4, AWD (205-04 Front Drive Halfshafts, Removal and Installation).
-
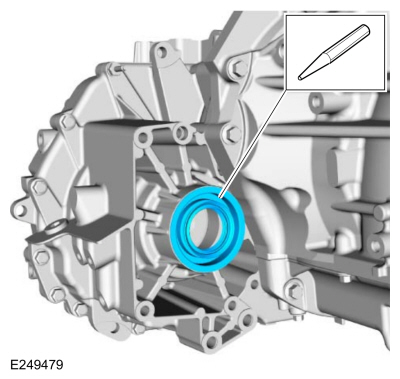
Using a punch, poke a small hole in the halfshaft seal.
Use the General Equipment: Punch
 |
-
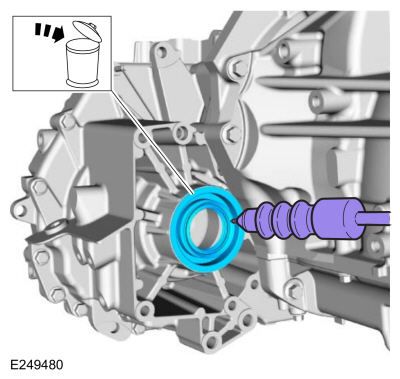
Using a dent puller, remove and discard the halfshaft seal.
Use the General Equipment: Puller
 |
Installation
-
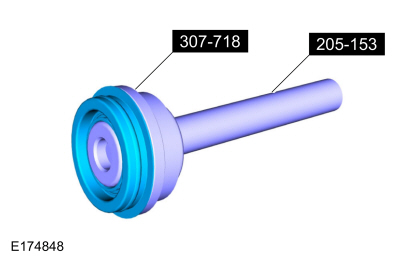
Install a new halfshaft seal on the special tools.
Use Special Service Tool: 205-153 (T80T-4000-W) Handle. , 307-718 Installer, Axle Seal.
 |
-
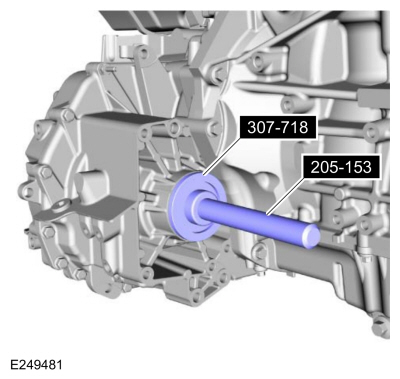
Using the special tools, install the RH halfshaft seal.
Use Special Service Tool: 205-153 (T80T-4000-W) Handle. , 307-718 Installer, Axle Seal.
 |
-
Install the RH halfshaft.
Refer to: Front Halfshaft RH - 2.0L Duratec-HE (125kW/170PS) – MI4, AWD (205-04 Front Drive Halfshafts, Removal and Installation).
-
Check the transmission fluid level.
Refer to: Transmission Fluid Level Check (307-01B Automatic Transmission - 6-Speed Automatic Transmission – 6F35, General Procedures).
 Removal and Installation - Halfshaft Seal RH - AWD
Special Tool(s) /
General Equipment
205-153
(T80T-4000-W)
Handle
307-718Installer, Axle SealTKIT-2013B-FLTKIT-2013B-ROW
307-718-01Adaper, 307-718
Puller
Punch
Removal
Remove the transfer case assembly...
 Removal and Installation - Main Control Cover
Removal
With the vehicle in NEUTRAL, position it on a hoist.
Refer to: Jacking and Lifting - Overview (100-02 Jacking and Lifting, Description and Operation)...
Other information:
Ford Ecosport 2014-2026 Service and Repair Manual: Description and Operation - Climate Control System - Vehicles With: Electronic Automatic Temperature Control (EATC) - Component Location
1.5L Duratorq-TDCi shown, All others similar Item Description 1 Receiver drier element 2 Condenser 3 A/C compressor outlet line 4 A/C compressor 5 A/C compressor inlet line 6 A/C pressure transducer 7 Condenser outlet line 8 Evaporator inlet and outlet manifold 9 Thermostatic..
Ford Ecosport 2014-2026 Service and Repair Manual: Removal and Installation - Receiver Drier Element
Removal NOTE: Removal steps in this procedure may contain installation details. Remove the condenser. Refer to: Condenser - 1.5L Duratec (90kW/120PS) – I3 (412-00 Climate Control System - General Information, Removal and Installation). Refer to: Condenser - 2.0L Duratec-HE (129kW/175PS) (412-00 Climate Control System - General Information, Removal and Installation)...
Categories
- Manuals Home
- 2nd Gen Ford Ecosport Service Manual (2014 - 2026)
- Automatic Transmission - 6-Speed Automatic Transmission – 6F35
- Removal and Installation - Transmission
- Diagnosis and Testing - Body Control Module (BCM)
- Removal and Installation - Front Seat
- Removal and Installation - Catalytic Converter
Disassembly - Engine
Special Tool(s) / General Equipment
 205-153
(T80T-4000-W)
205-153
(T80T-4000-W)
Handle
 303-103
(T74P-6375-A)
303-103
(T74P-6375-A)
Holding Tool, Flywheel
T74P-77000-A
TKIT-2009TC-F
 303-1247
VCT Spark Plug Tube Seal Remover and Installer
TKIT-2006UF-FLM
TKIT-2006UF-ROW
 303-15

Copyright © 2026 www.foecosport2.com